1 System Login & Opening Shift
The system provides role-based authentication. Staff members (Cashiers, Chefs, Managers) are automatically presented with their designated operational interfaces upon signing in.
1.1 Staff Sign-in Procedure
-
Open the POS application on your touchscreen terminal or tablet
(
https://[your-domain]/login). - Enter the Email (or Staff ID) and Password (or PIN) assigned by your store manager.
- Click 【Sign in】 to access the terminal.
1.2 Recording the Opening Cash Float
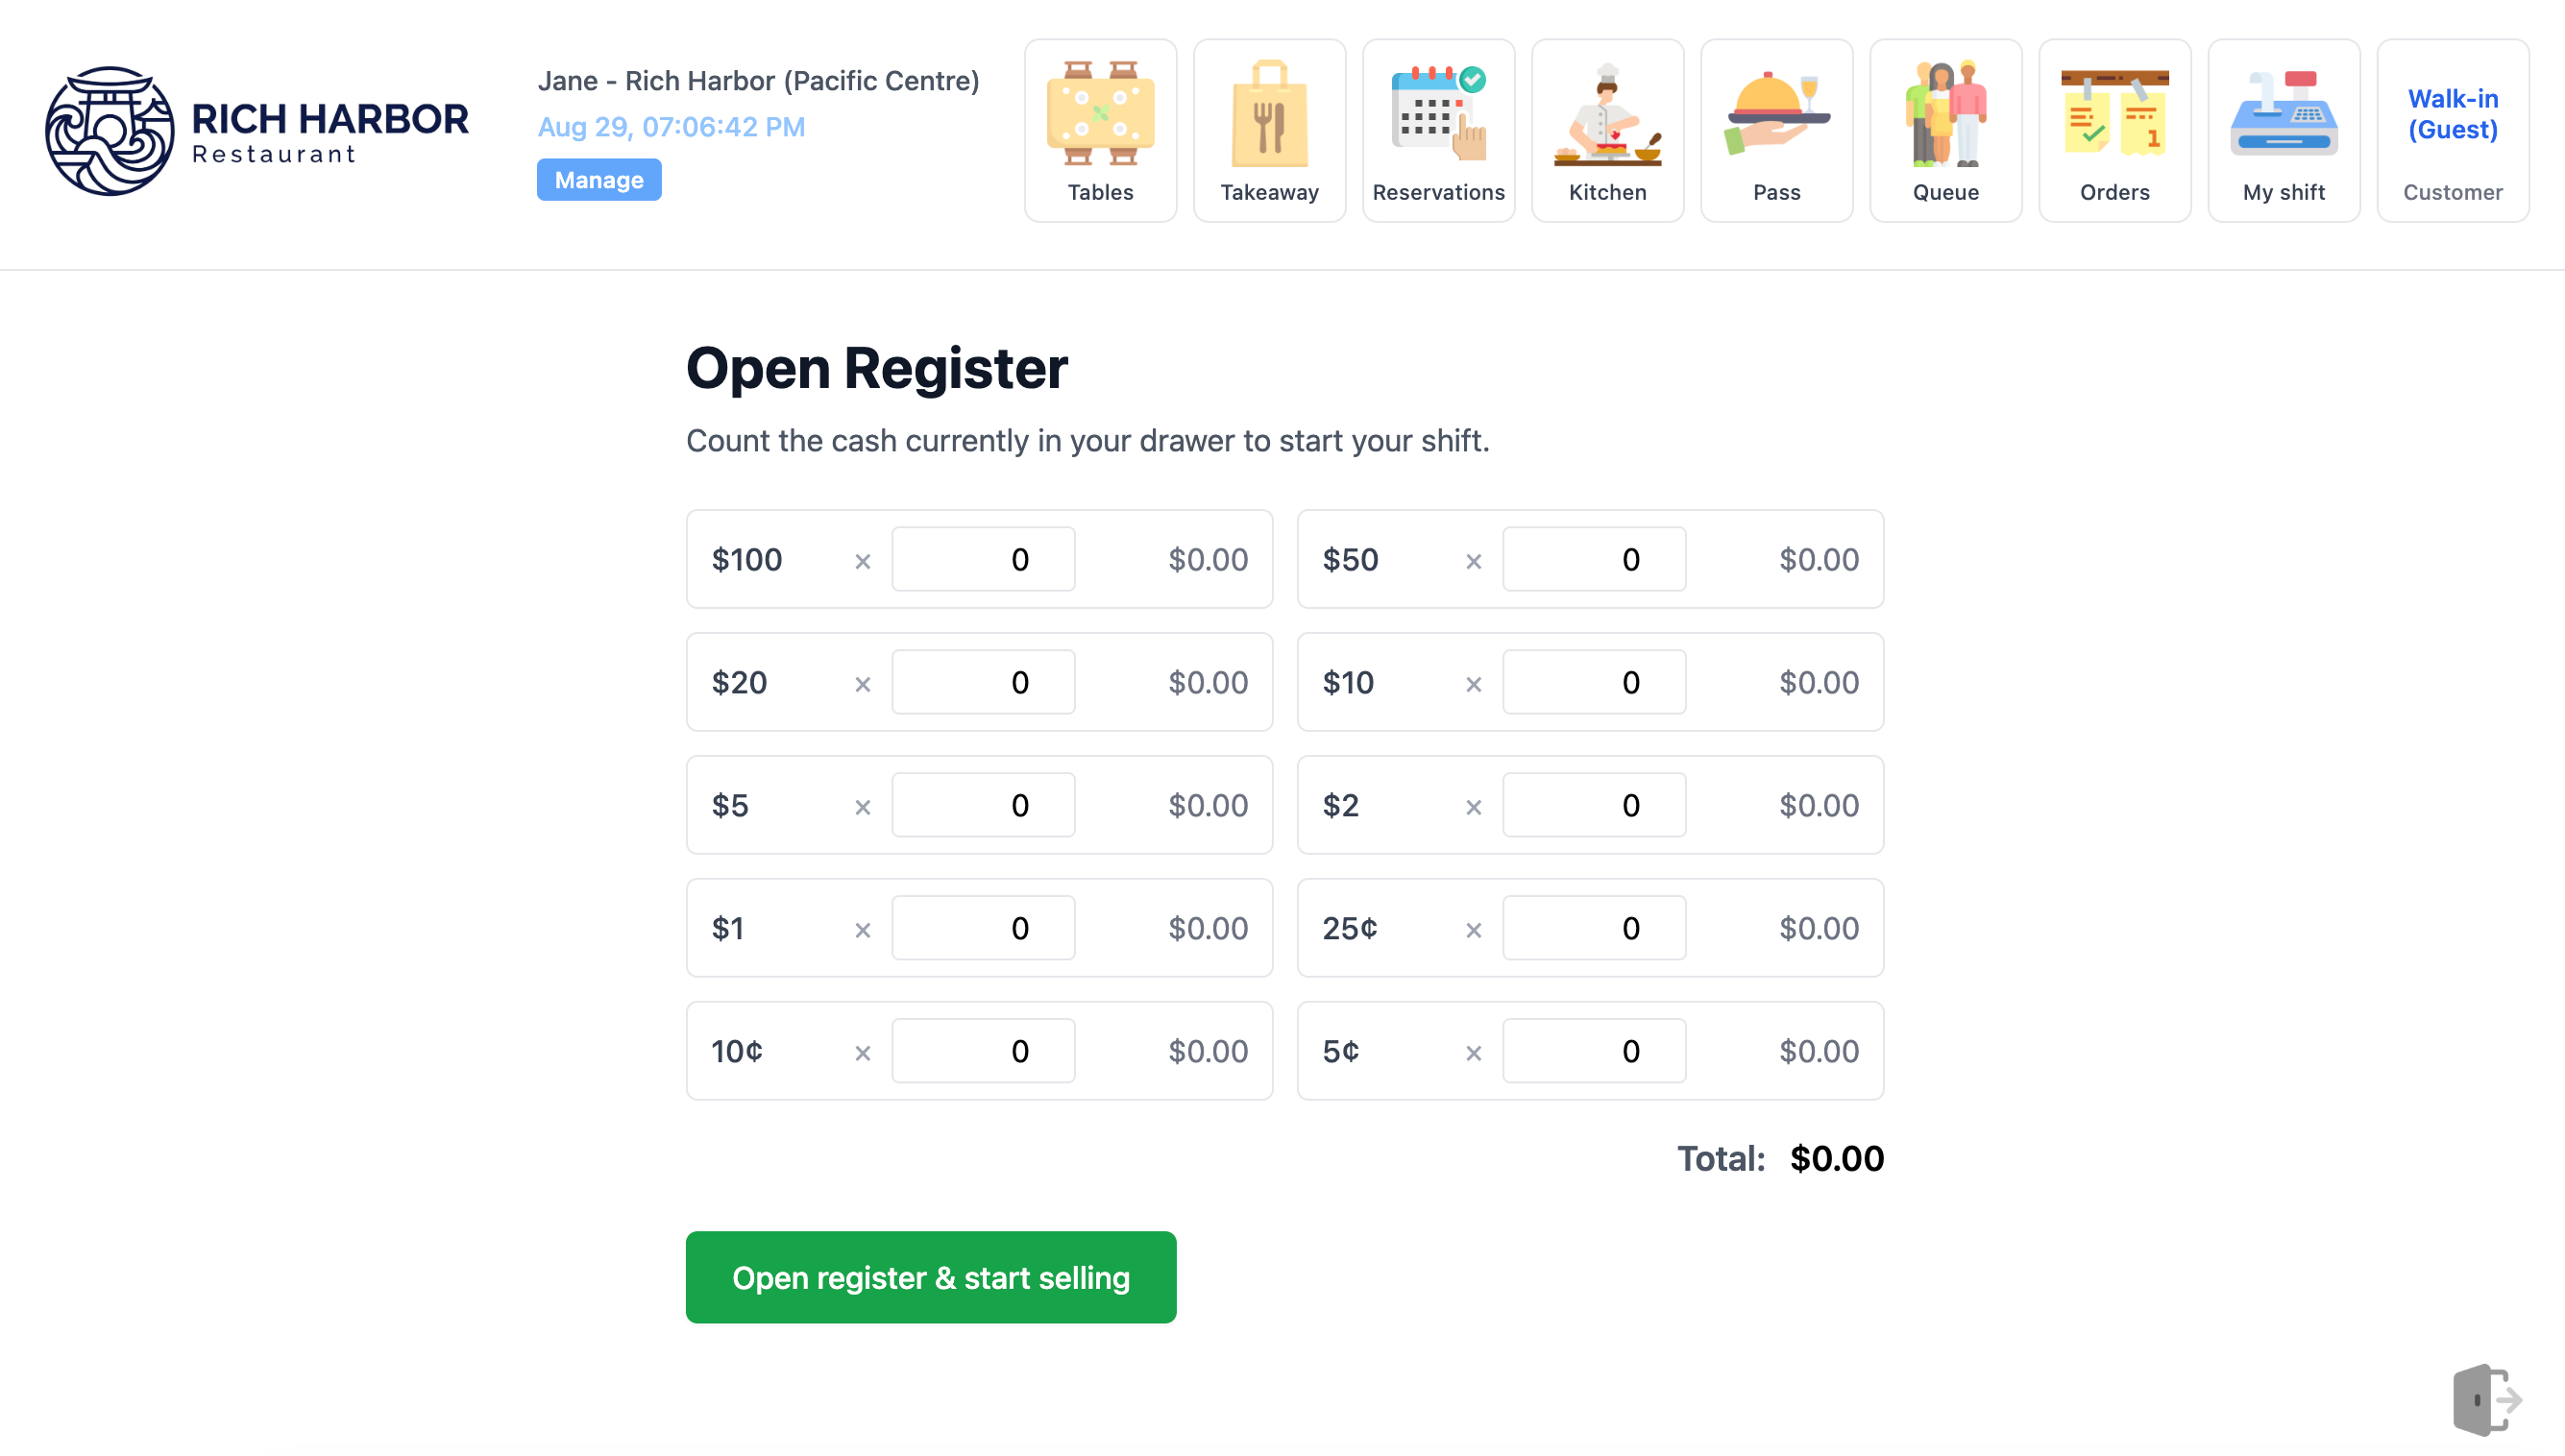
Upon starting the first shift of each business day, the system automatically redirects to the opening float count page:
- Enter the counted quantities for each denomination bill/coin ($100, $50, $20, $10, $5, $2, $1, $0.25, etc.).
- The system automatically computes the opening float total (e.g., $700.00).
- Click 【Start Shift】 to open the cash drawer and start recording the daily cash audit trail.
2 Mid-Shift Cash Drawer Operations
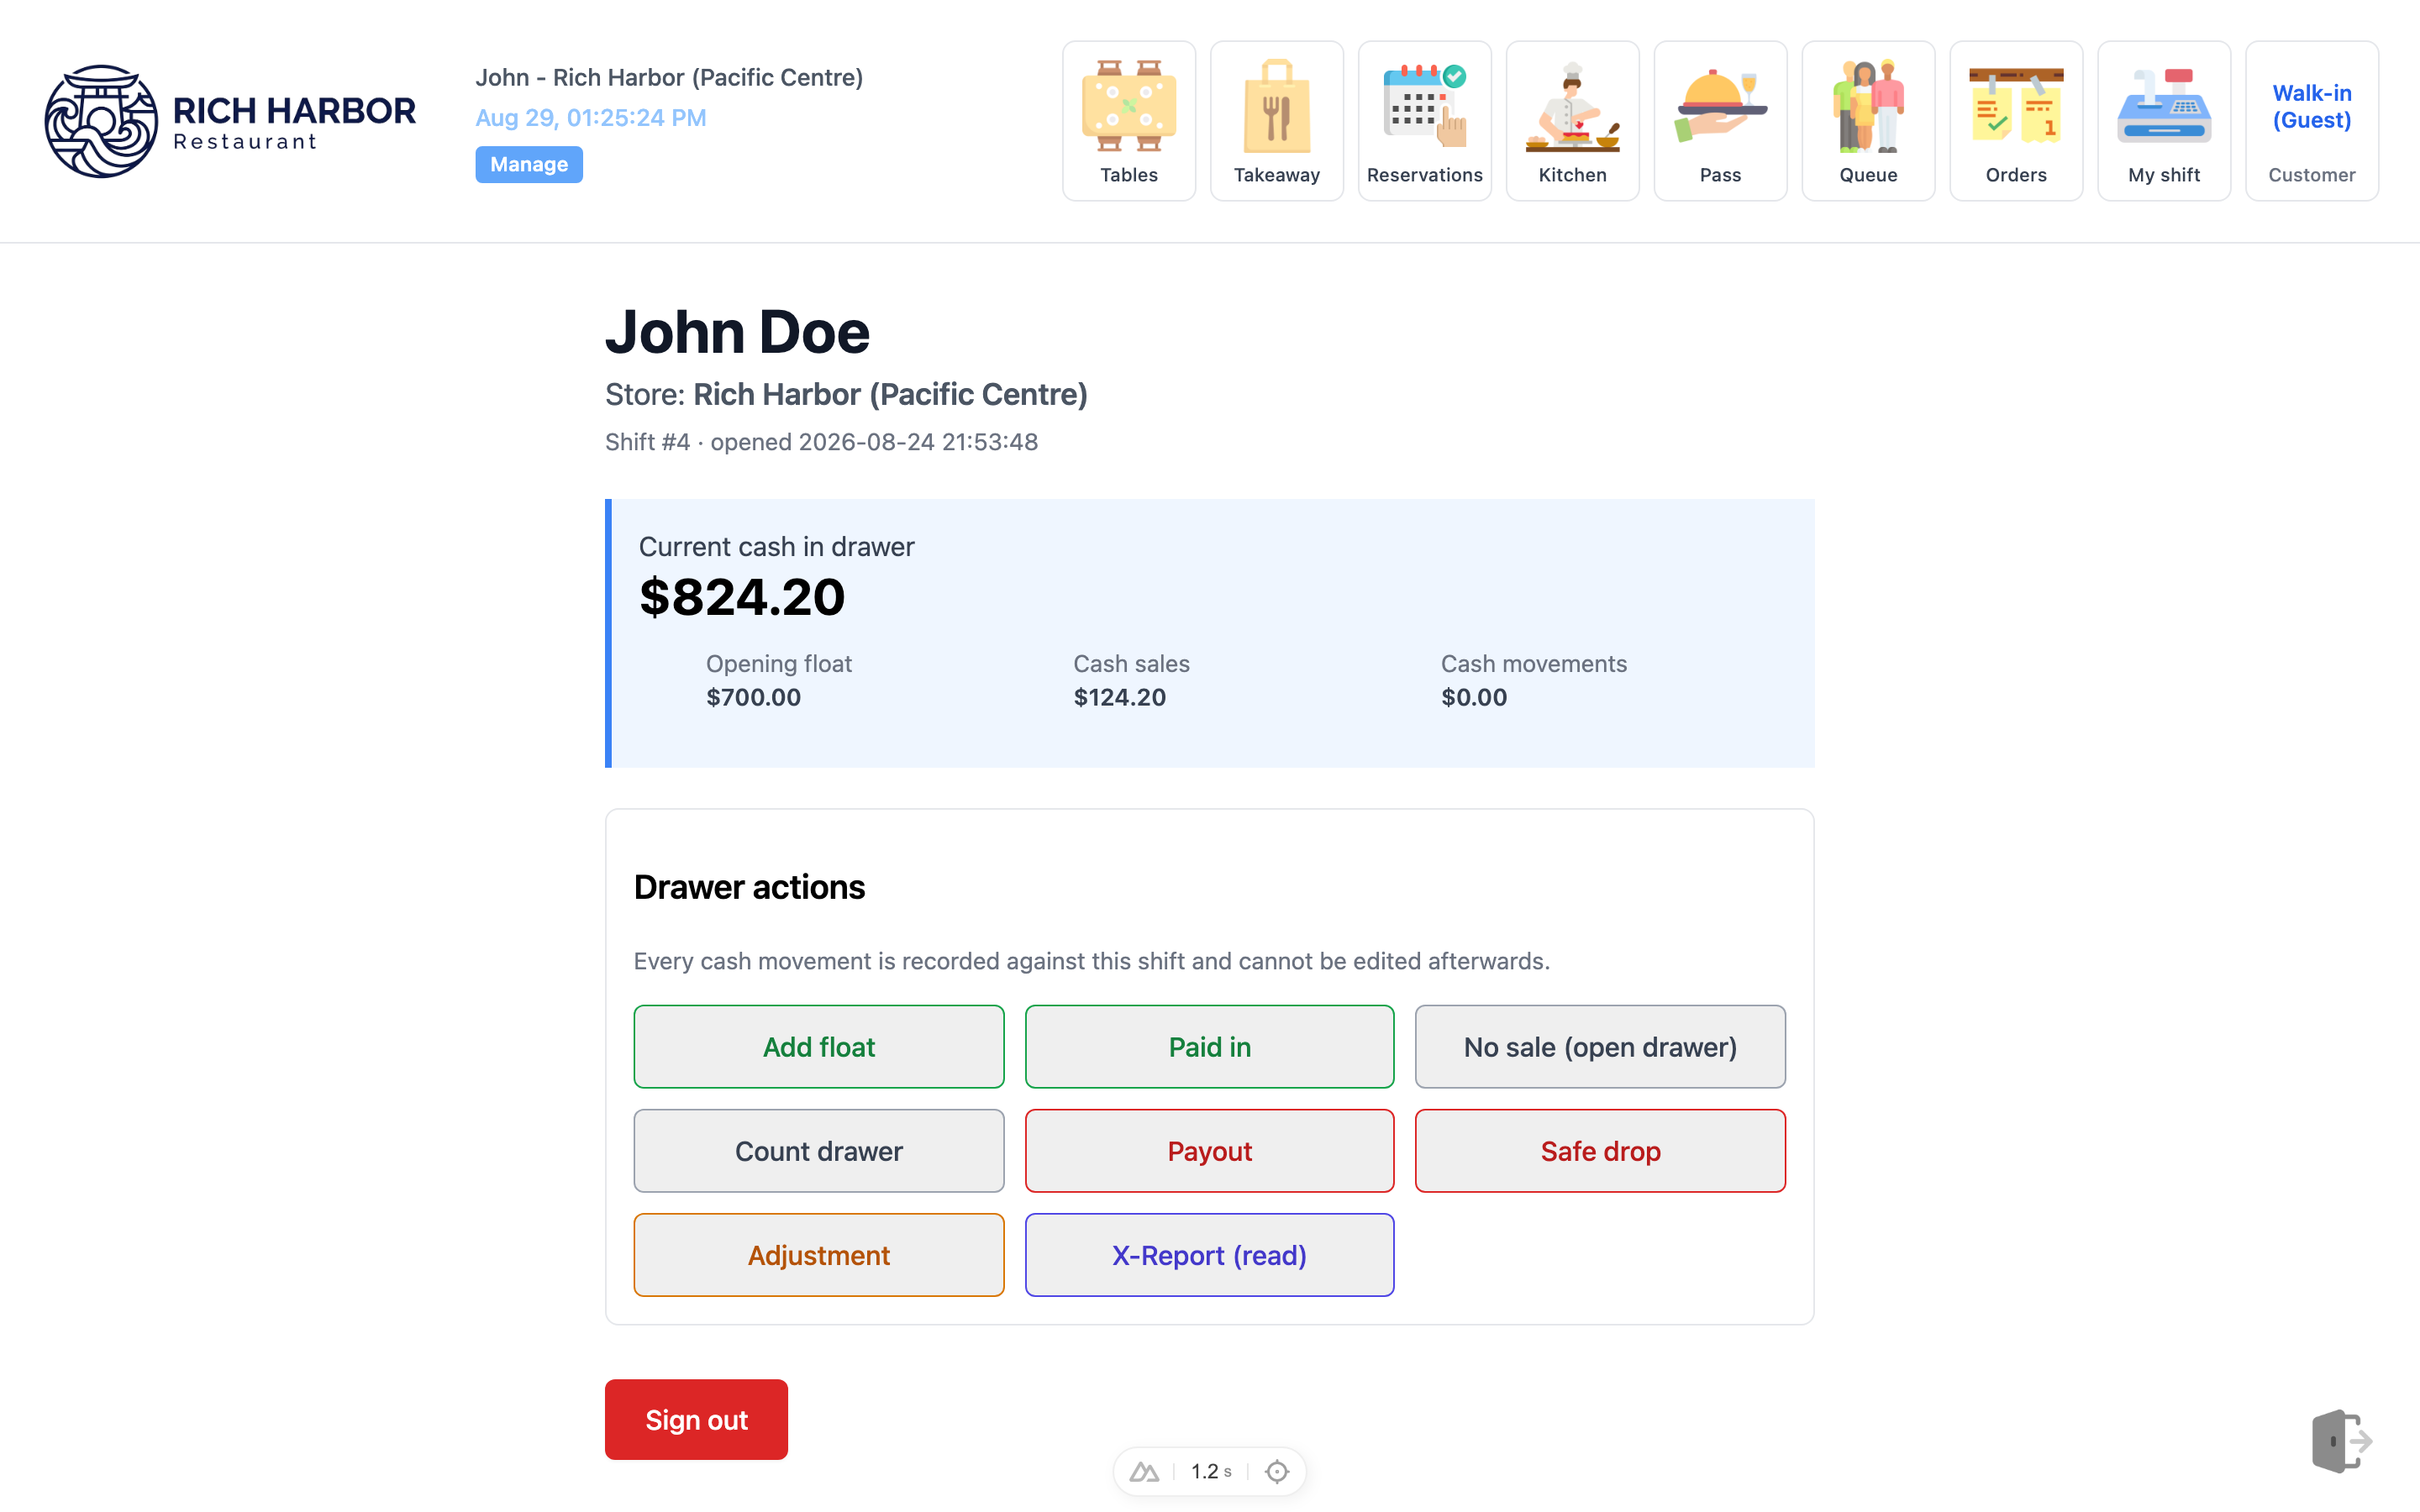
Click the 【My shift】 icon in the top navigation bar to access the register dashboard.
2.1 Live Cash Balance Indicators
- Current cash in drawer: Total theoretical cash currently expected in the drawer (Opening Float + Cash Sales - Cash Payouts).
- Opening float: Initial starting change fund.
- Cash sales: Cumulative cash sales revenue recorded today.
2.2 Drawer Action Reference Guide
| Button Action | Business Scenario | Operational Details |
|---|---|---|
| Add float | Replenishing change from the safe when coins/bills run low. | Enter the added amount and denominations; drawer pops open and logs the float addition. |
| Paid in | Miscellaneous non-sales cash deposits. | Enter amount and mandatory business reason. |
| Payout | Emergency kitchen ingredient purchase or courier fee. | Mandatory amount and reason entry; system prints an expense receipt voucher. |
| Safe drop | Skimming large cash amounts into the drop safe during peak hours. | Manager permission required. Loss-prevention action removing excess cash from drawer. |
| No sale | Popping drawer to inspect bills or reorganize change. | Drawer opens without altering balance; audit event is recorded in the backend. |
| X-Report (read) | Mid-shift financial reading without closing shift. | Prints an interim summary of all sales and tenders while keeping the shift active. |
3 Floor Plan & Dine-in Table Seating
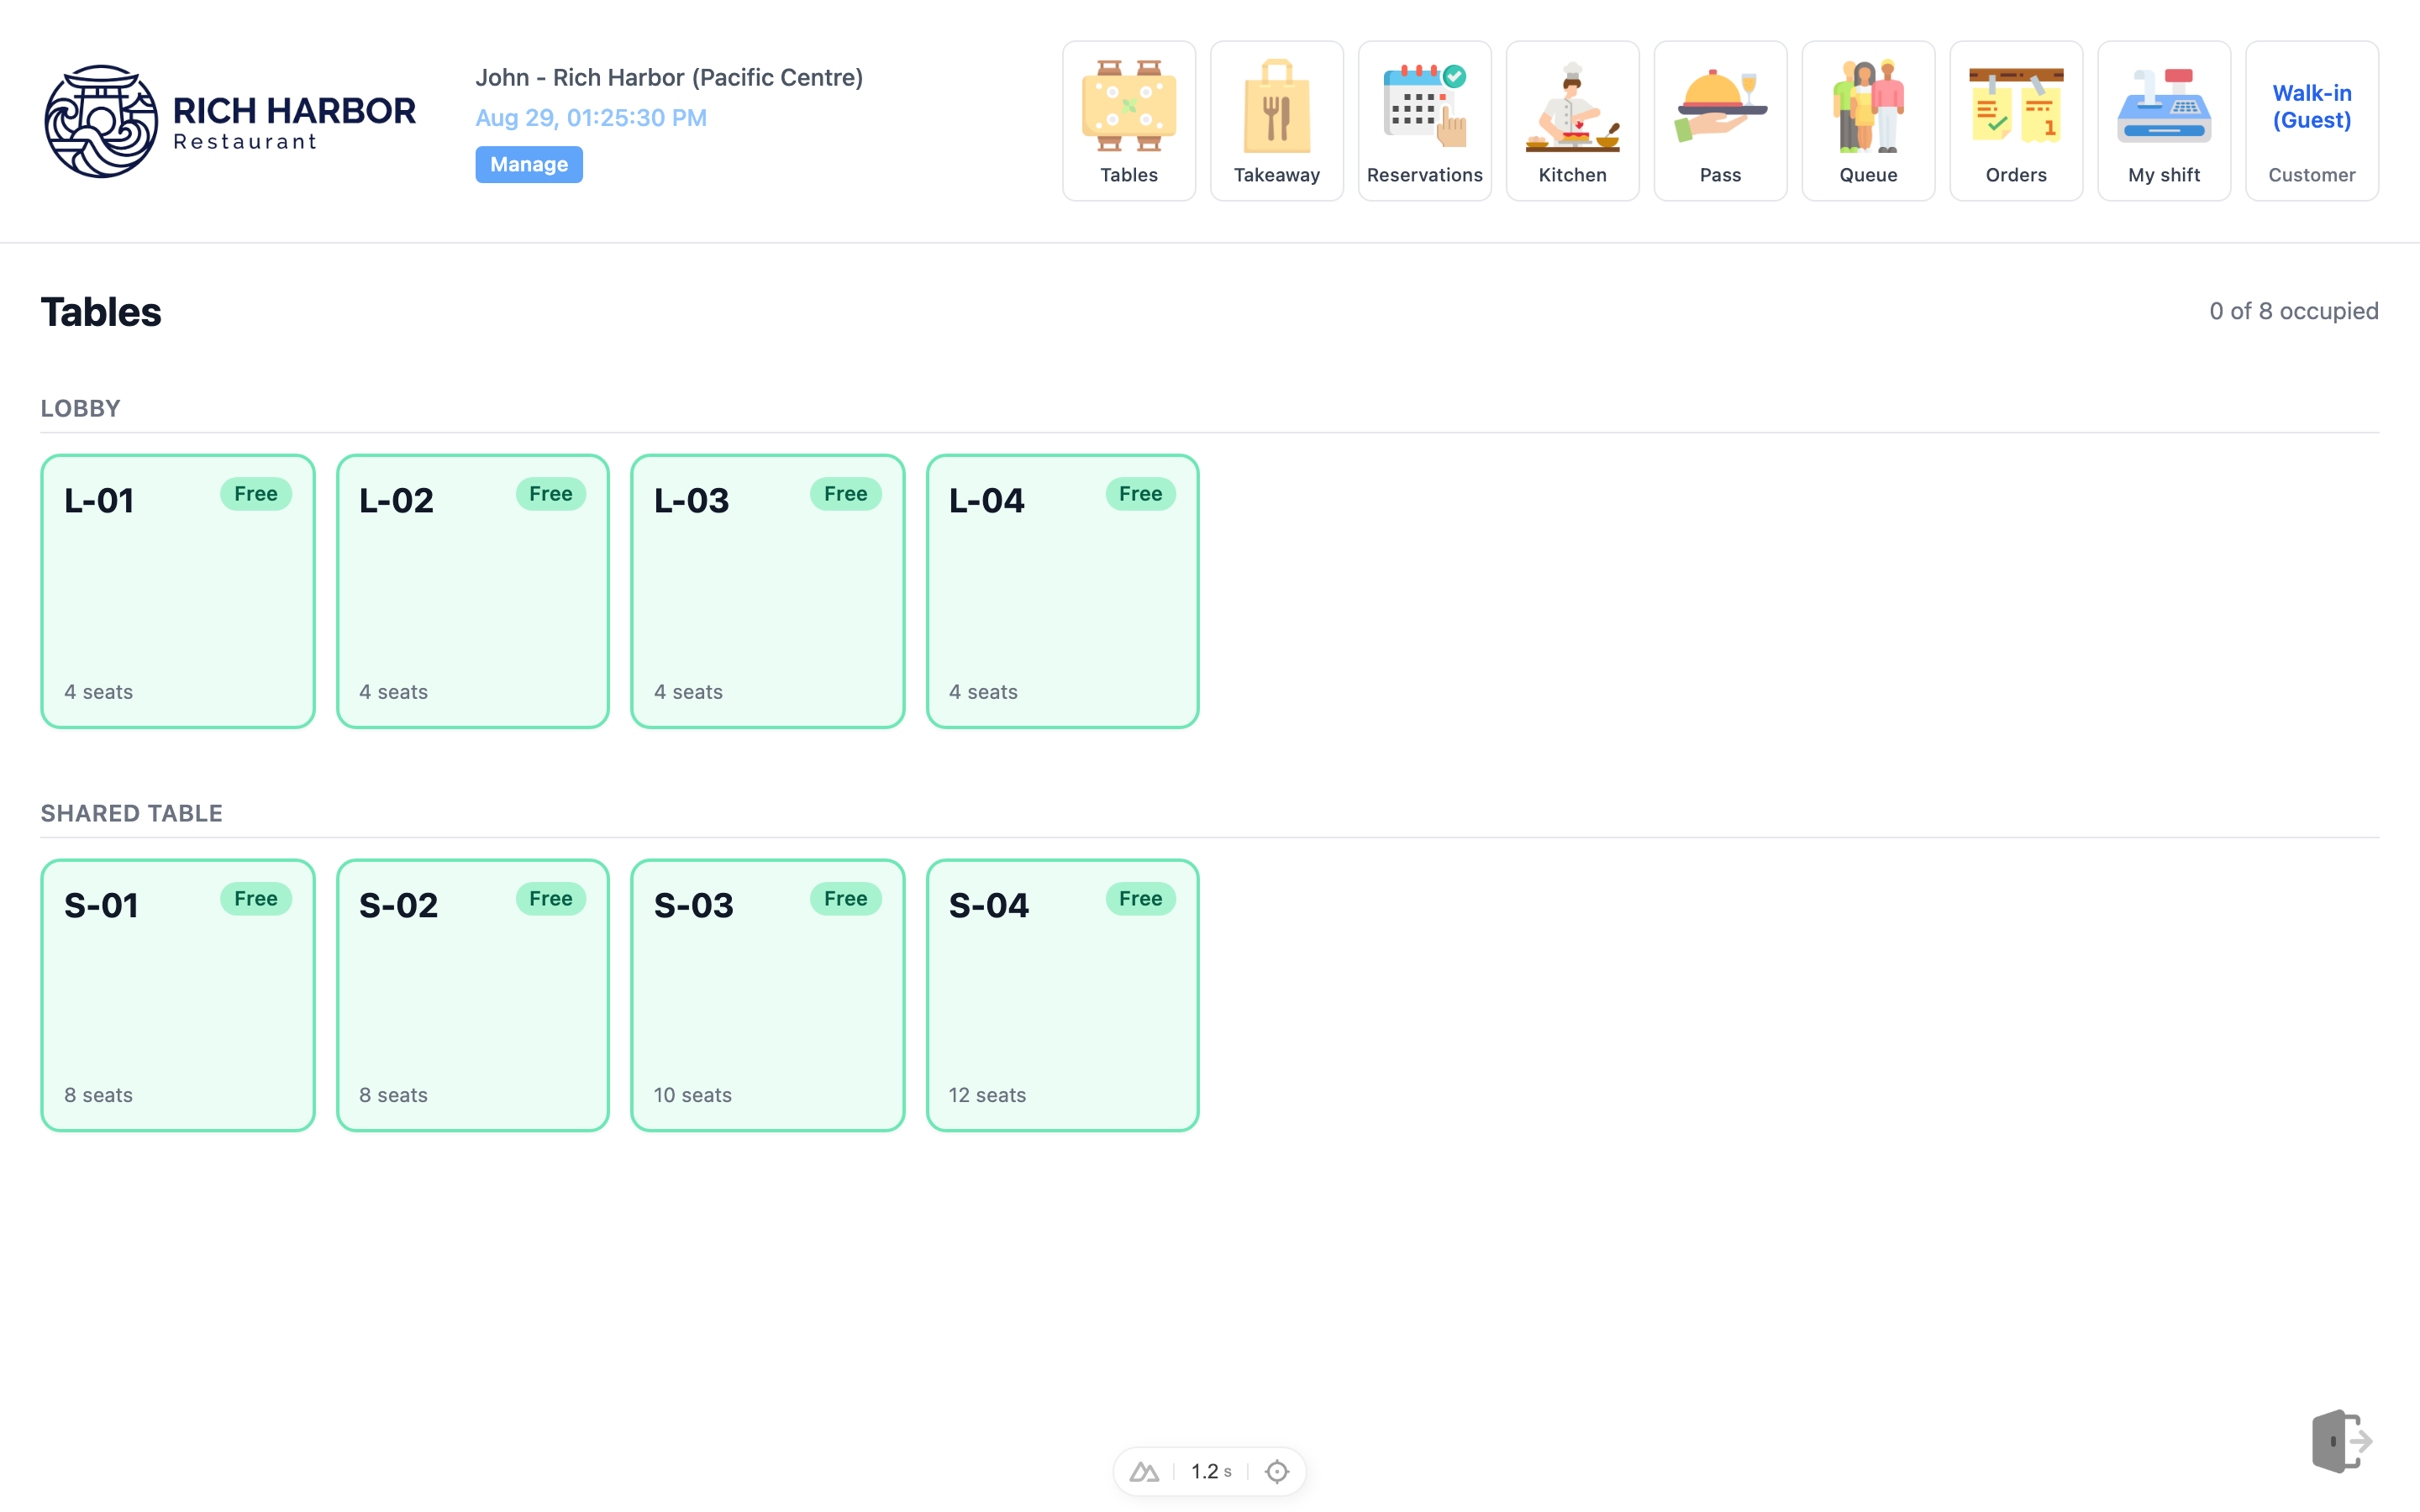
Click the 【Tables】 icon in the top header to view the live dining room floor map.
3.1 Table Status Identifiers
- ● Green (Free): Empty table. Tap to seat guests and begin ordering immediately.
- ● Blue (Occupied): In-service table displaying elapsed dining time and guest count.
- ● Orange Alert (1 ready): Indicates food is ready at the kitchen pass for delivery.
3.2 Communal Seating & Split Billing
In the S-01 to S-04 communal table section,
a large 8–12 seat table can host multiple independent parties
simultaneously (e.g., S-01-A, S-01-B),
allowing each group to order and settle their bill independently.
4 Ordering, Modifiers & Allergen Safety
4.1 Menu Item Selection & Modifiers
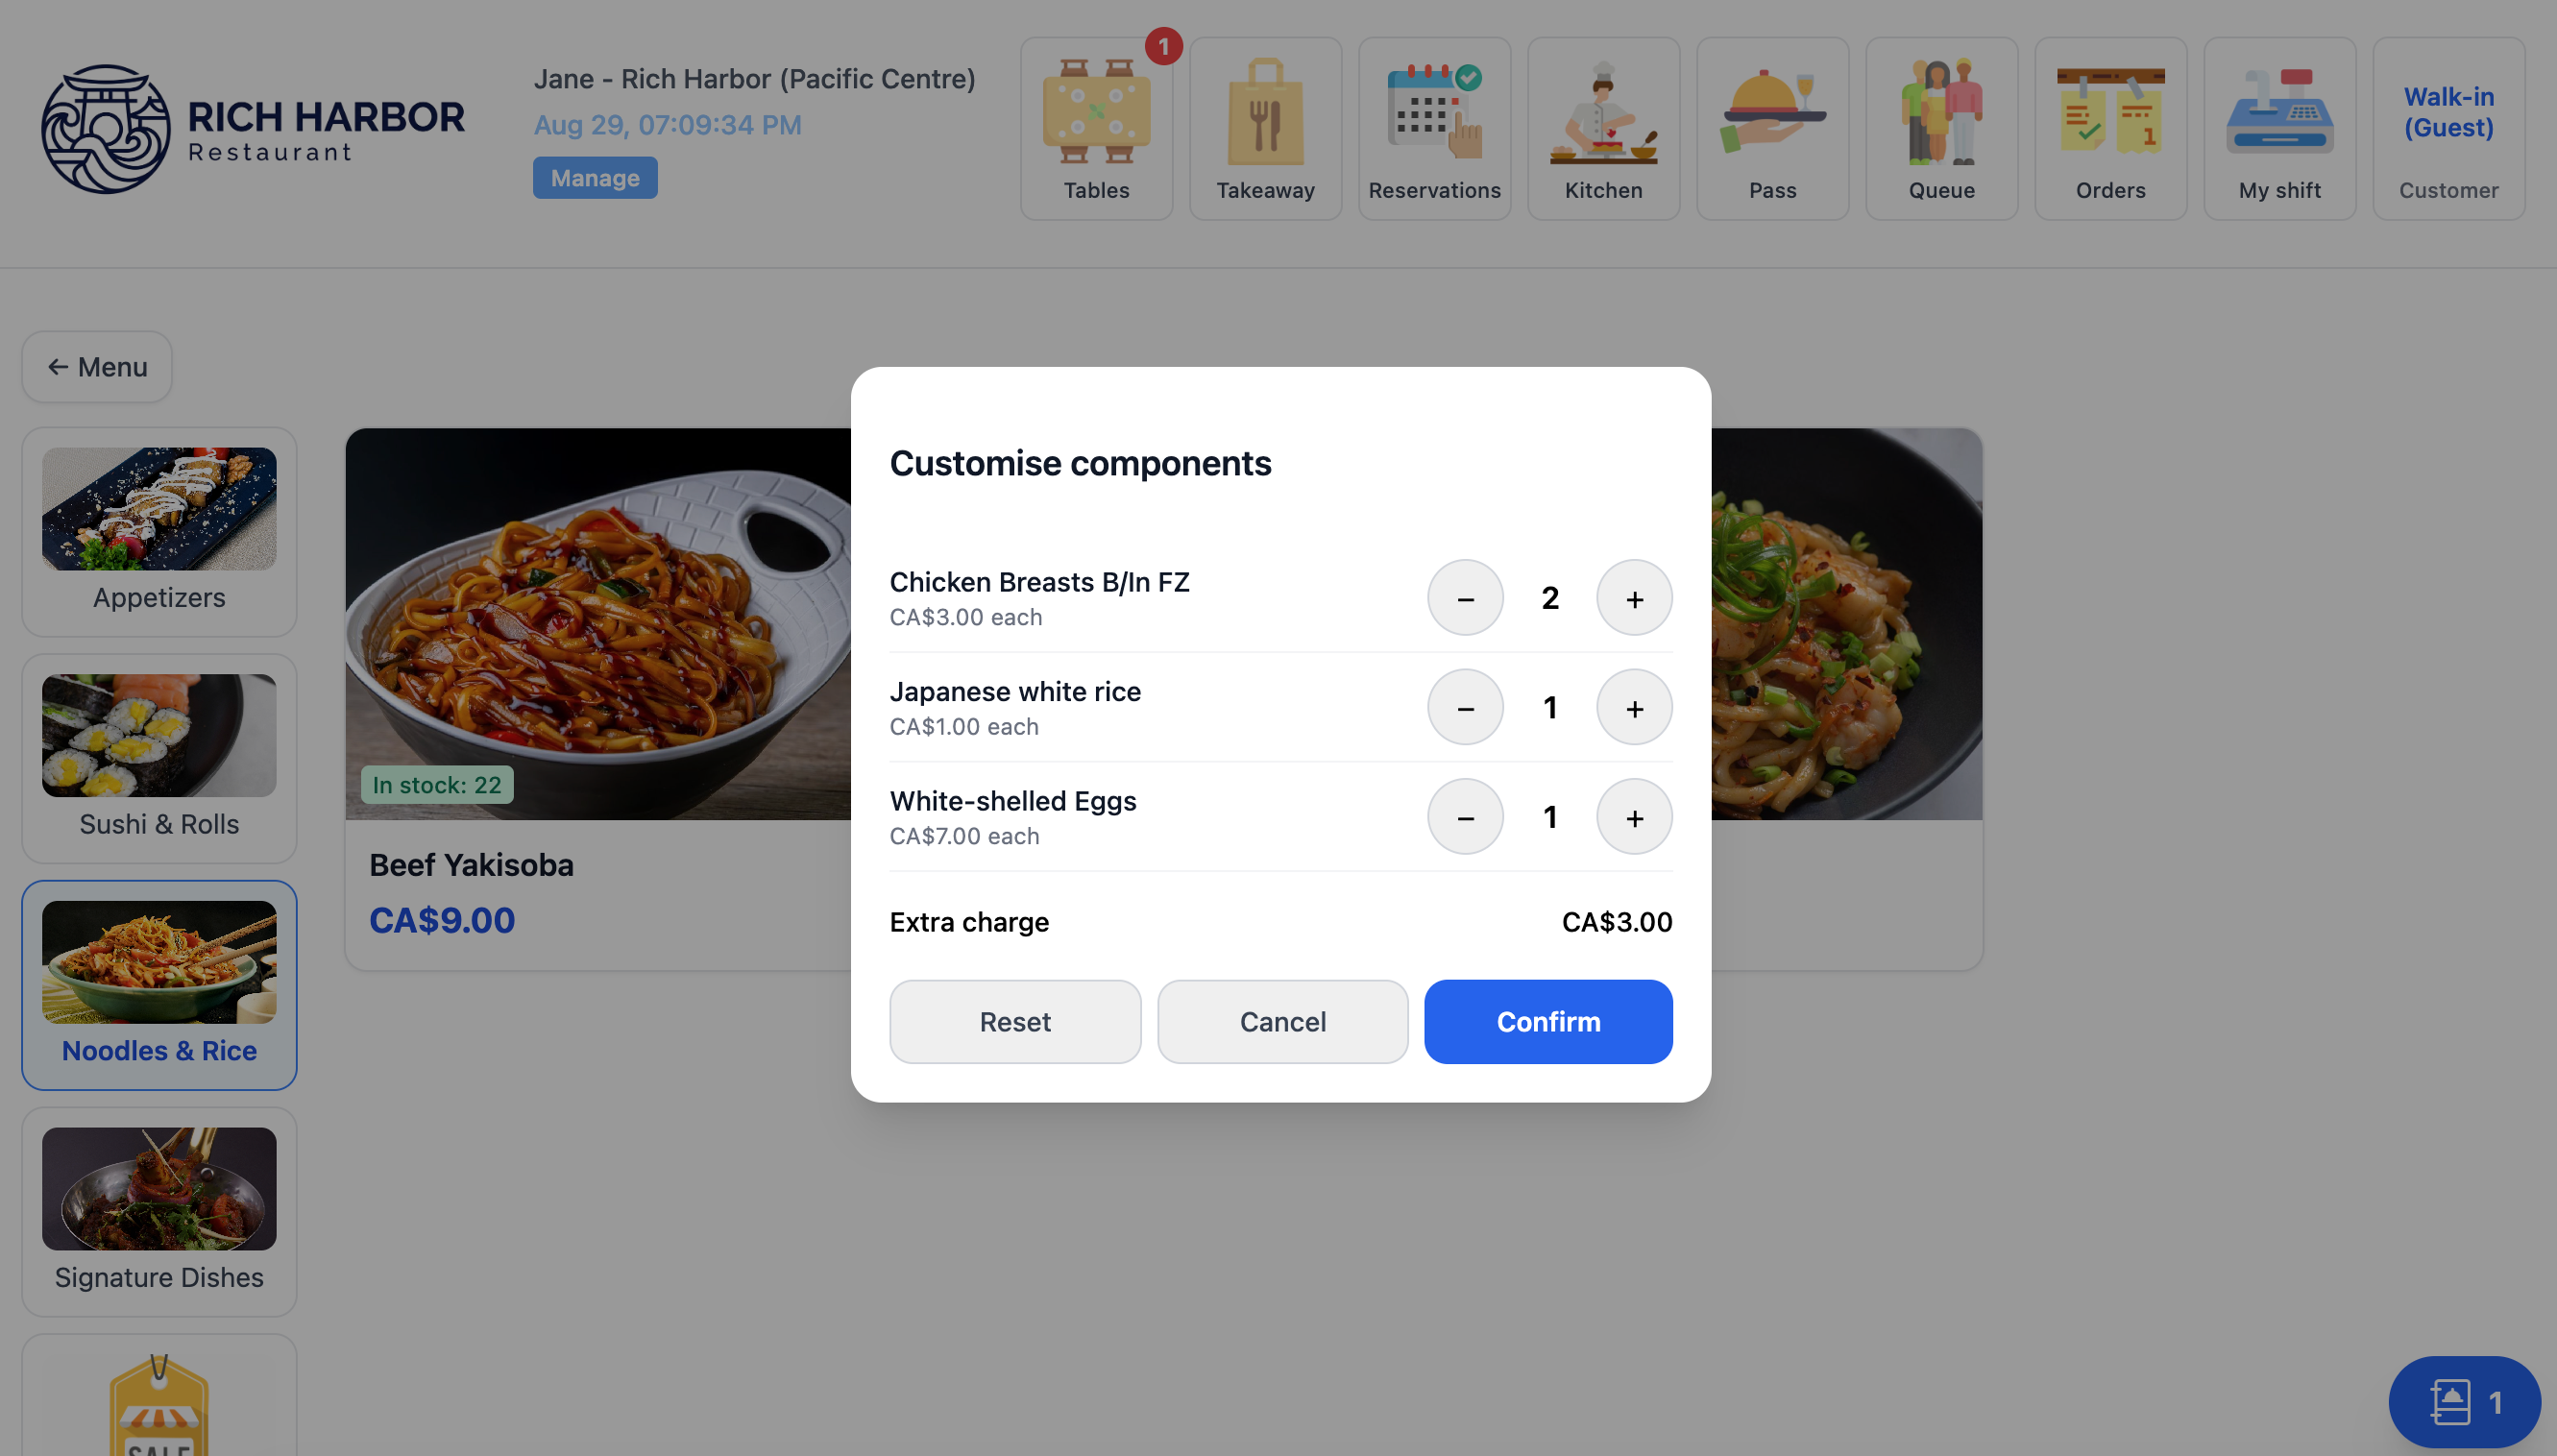
Tap any menu item card to open the modifier dialog (Portion sizes, Spice levels, Add-ons like extra eggs, cheese, or no scallions). All option prices calculate automatically.
In the order cart, click 【Allergen / Notes】 on any item row to check specific allergens (Peanuts, Tree Nuts, Shellfish, Seafood, Eggs, Gluten, Soy, Dairy) or type custom cooking instructions. If only 1 of 2 dishes has an allergy, specify quantity to auto-split the line. Kitchen tickets and KDS screens will highlight
⚠ ALLERGY in bold red.
4.2 Firing Orders (Send to Kitchen)
After verifying the cart items, click 【Send to Kitchen】. The ticket instantly routes to the kitchen display screen and prints out at the kitchen station printer.
5 Kitchen KDS Display System
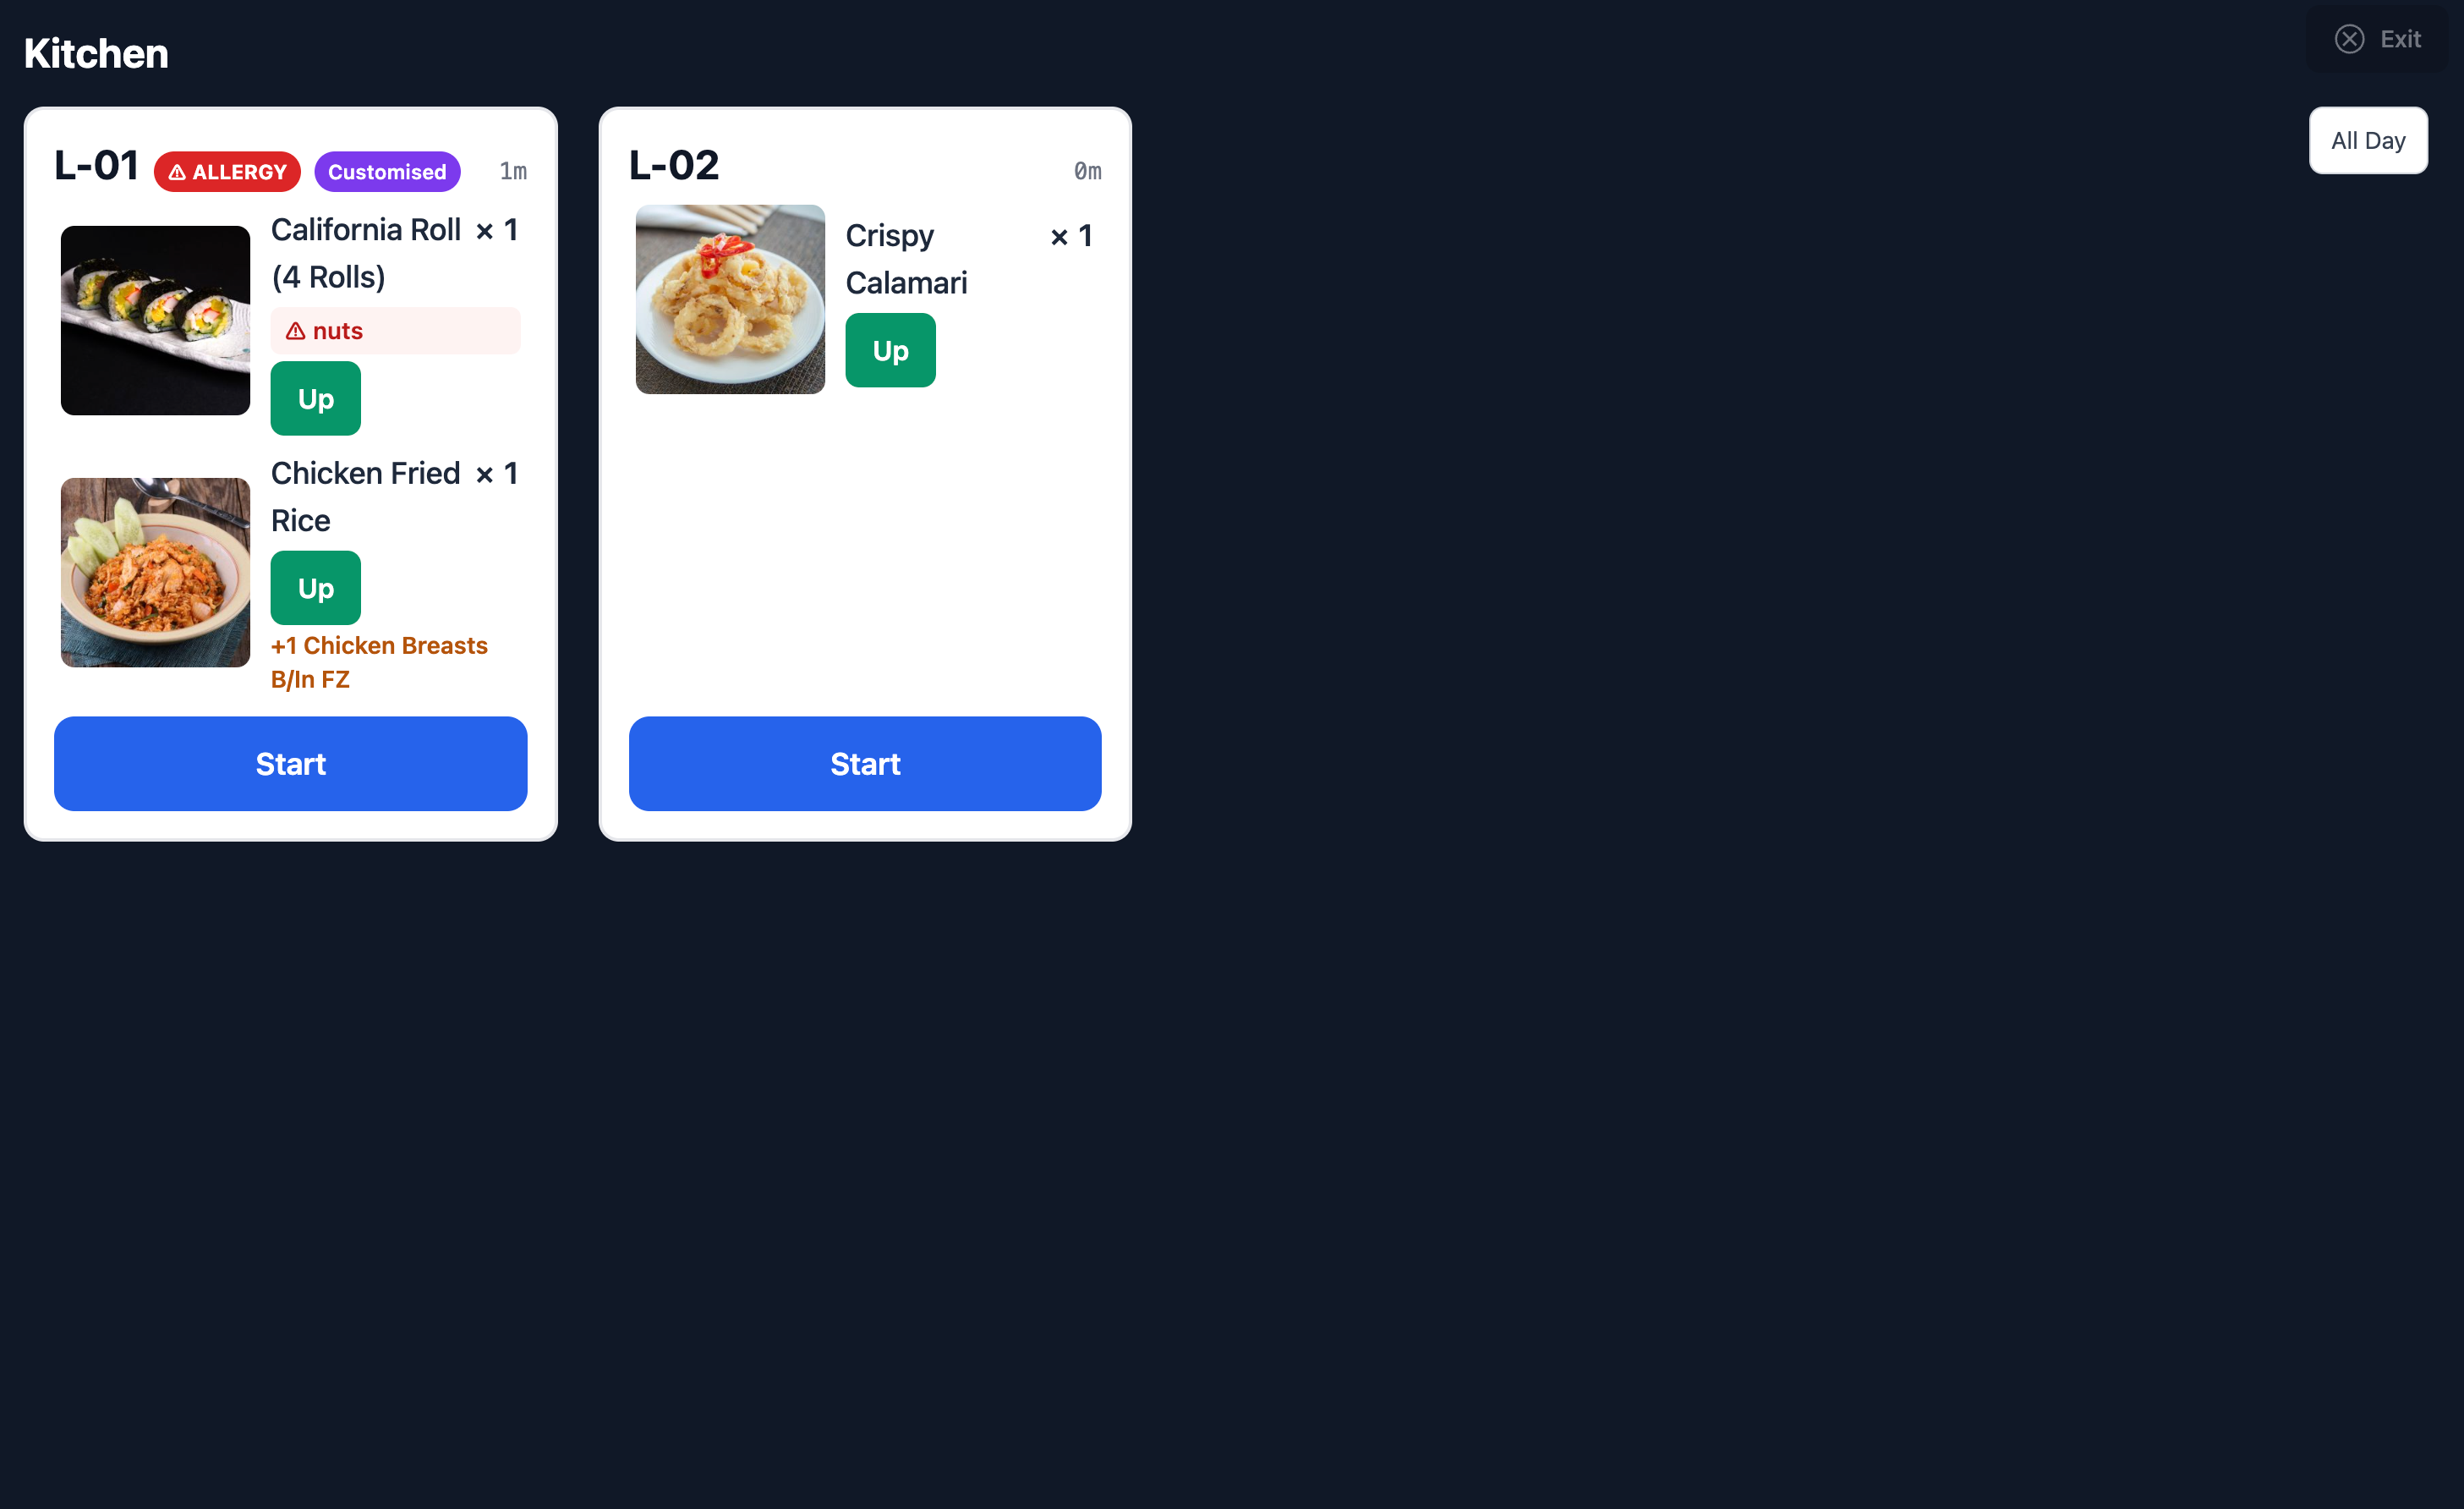
Chefs access the dedicated KDS screen by clicking 【Kitchen】 in the top header and clicking 【Fullscreen】 for display monitors:
5.1 Chef Workflow Steps
- Start: Tap when beginning preparation to move ticket to "In Preparation".
- Ready: Tap when cooking is finished. Floor tables instantly display ready-to-run badges.
- Bump: Tap when the runner serves the dish to clear the card from the display.
- Recall: Tap in the bottom-right corner to restore any accidentally bumped ticket.
5.2 Visual Timer Color Codes
- White/Green border: Elapsed time < 5 mins (On schedule).
- Yellow Alert: Elapsed time 5–10 mins (Urgent preparation).
- Red Critical: Elapsed time ≥ 10 mins (Overdue ticket requiring immediate priority).
6 Waitlist Queue & Smart Calling
Click the 【Queue】 tab in the navigation bar to manage walk-in waiting guests (Supports full-screen lobby TV projection):
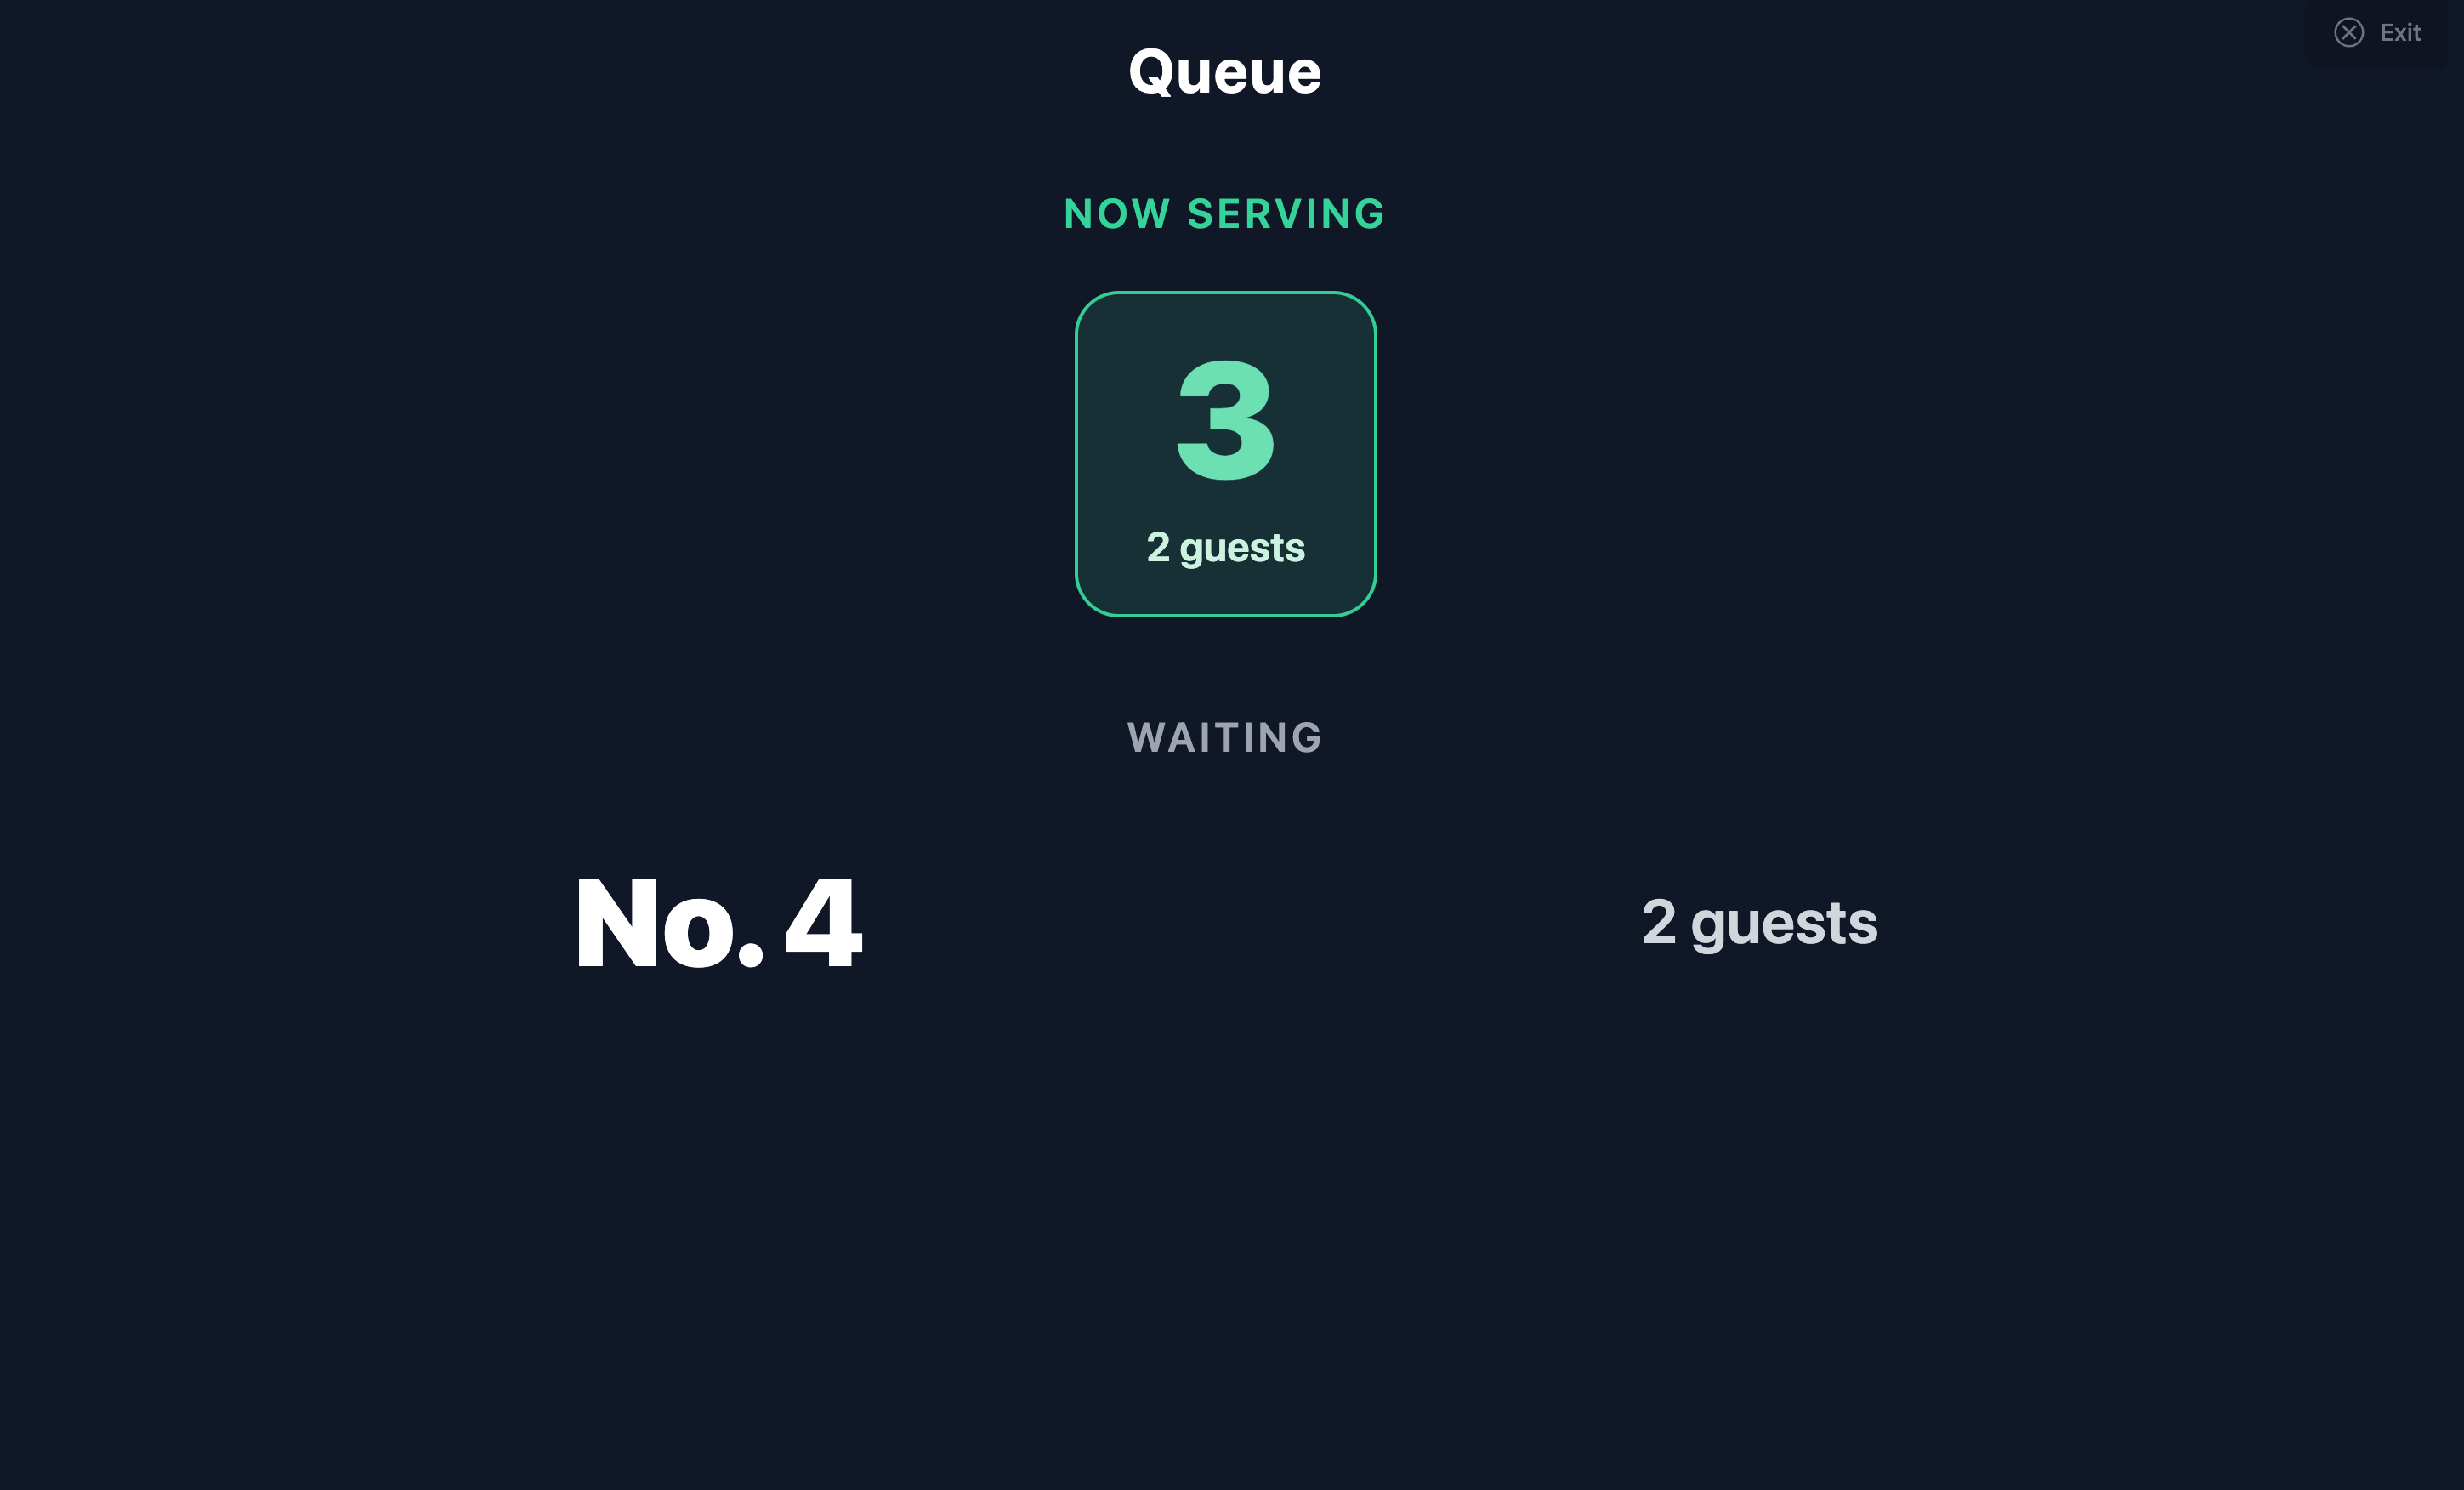
- + New ticket: Enter party size, guest name, and phone number. System estimates wait time based on store turn rates and prints a queue slip.
- Call: Triggers notification and starts a 15-minute grace period countdown.
- Seat: Automatically lists matching vacant tables for instant one-click seating.
7 Takeaway & Pickup Order Handling
Click 【Takeaway】 -> 【New Takeaway】 in the top header:
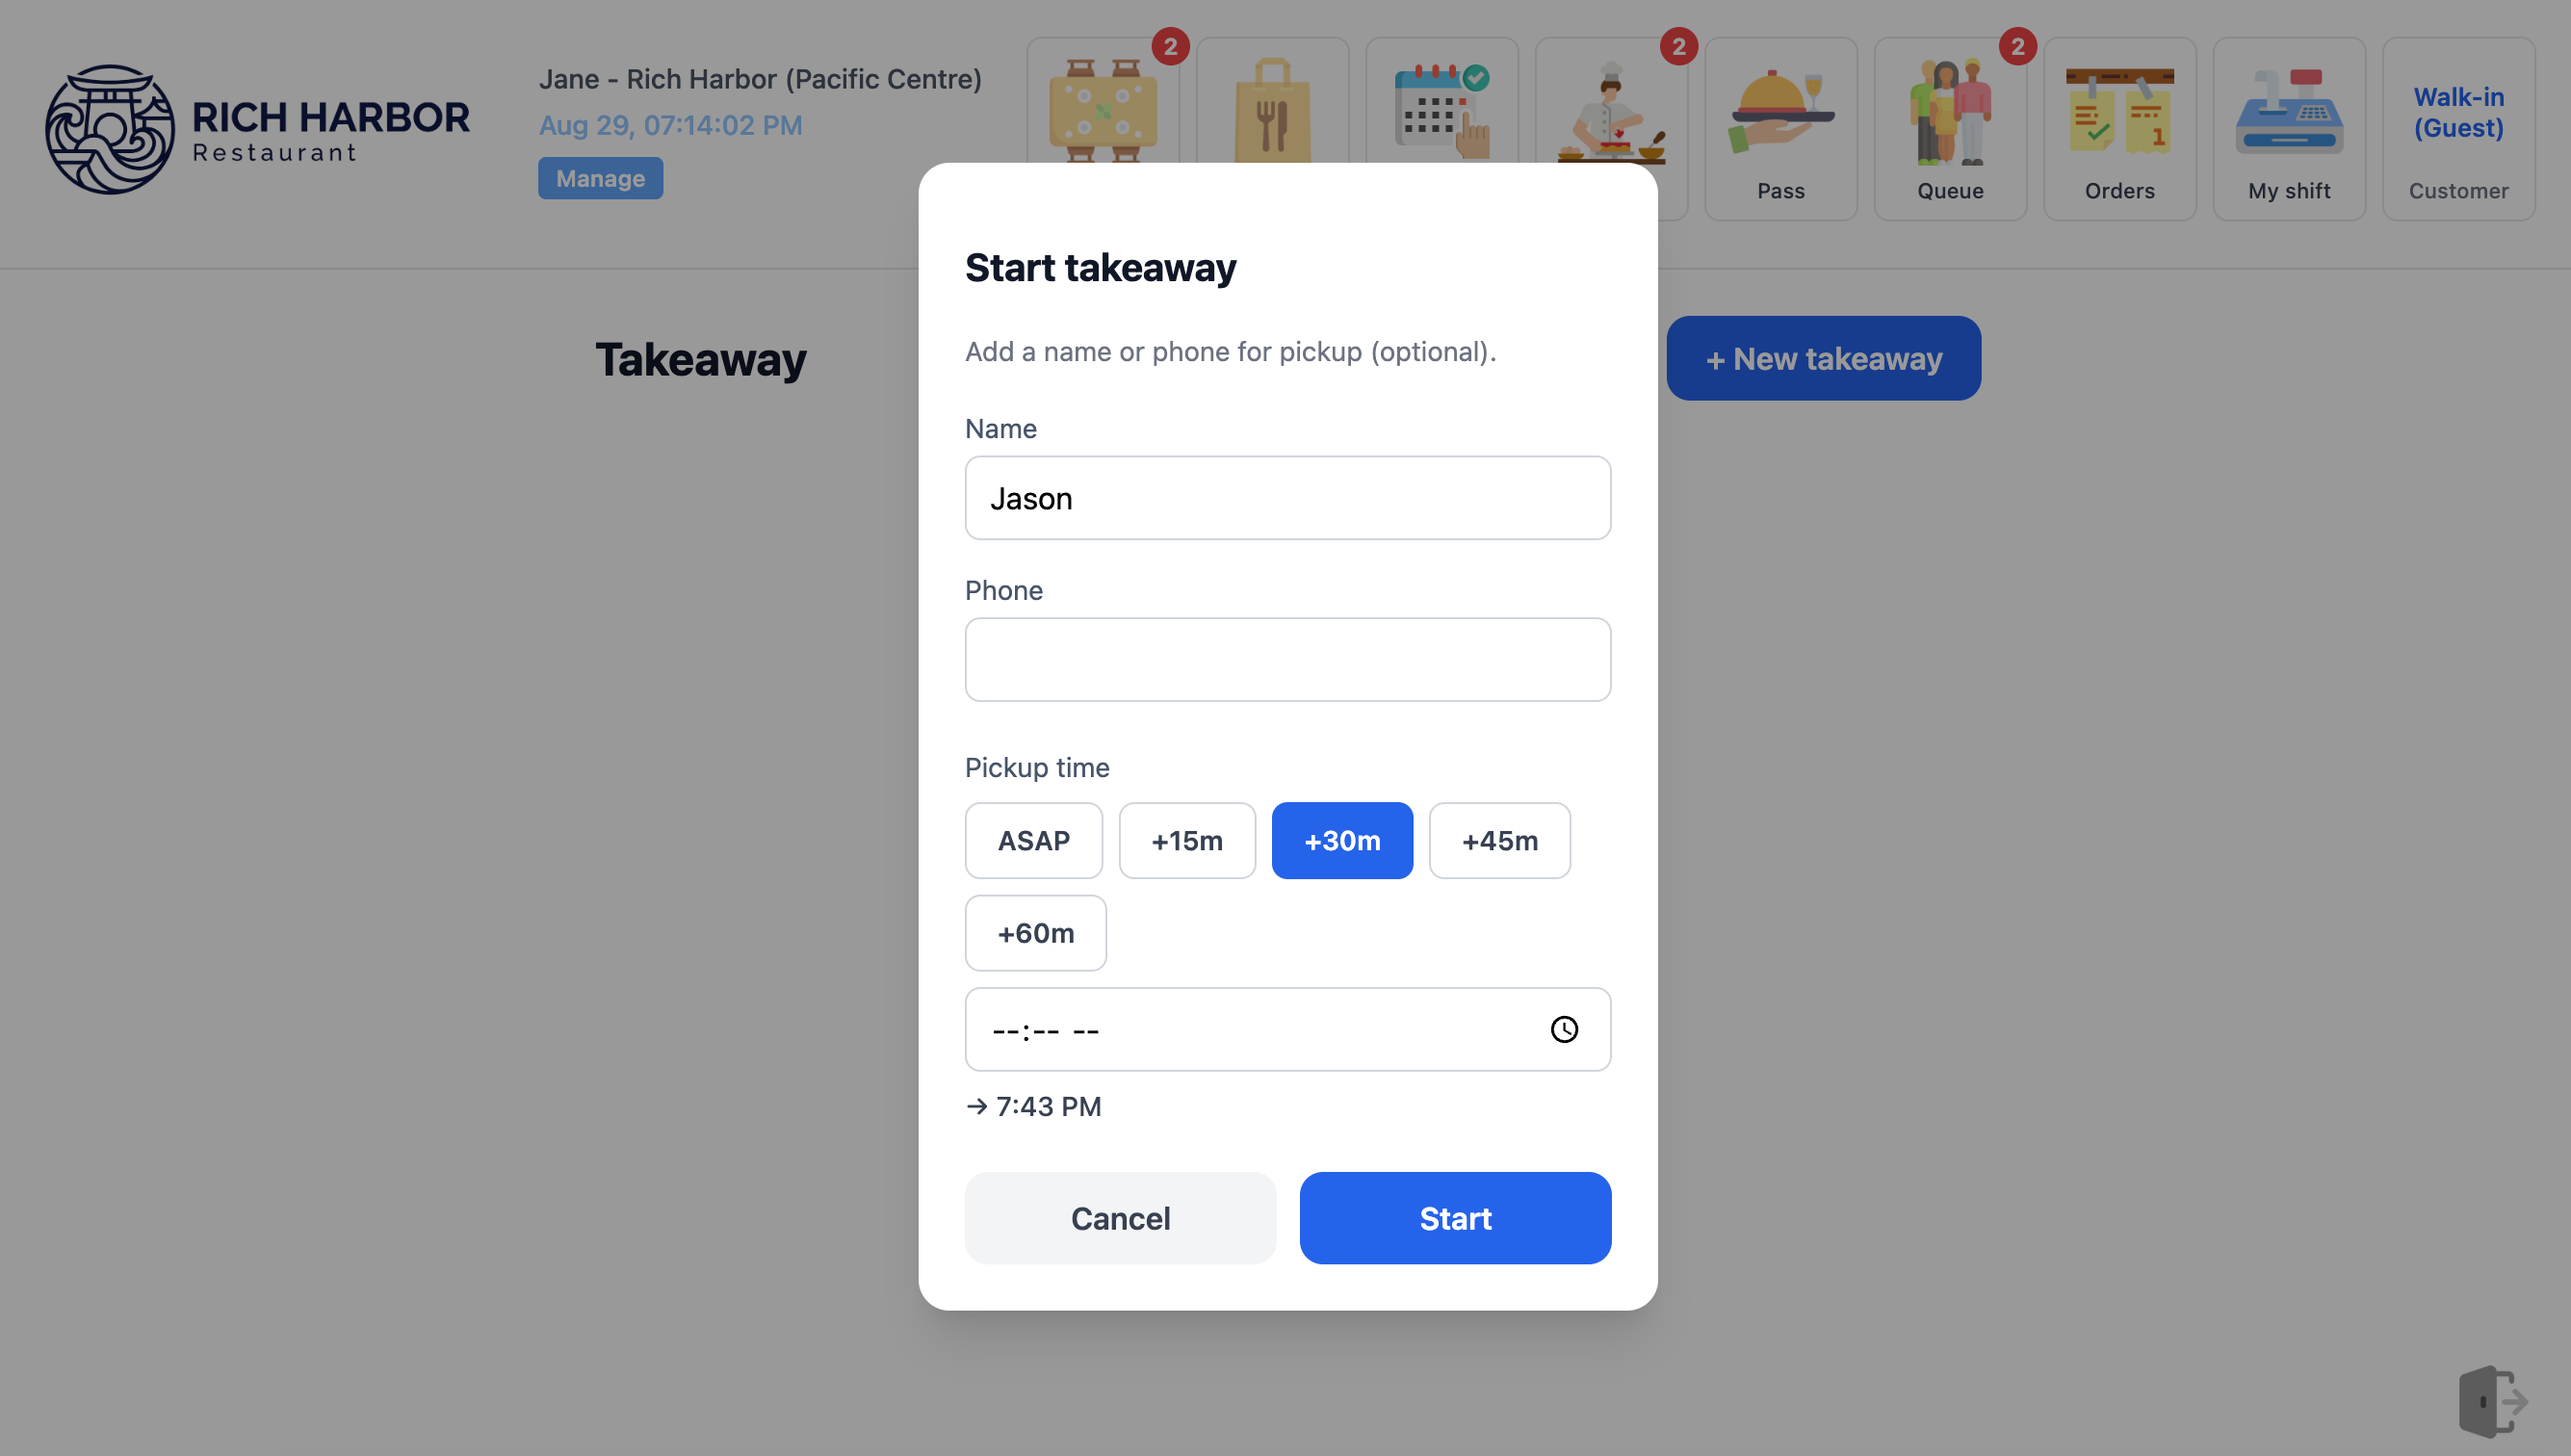
- Choose pickup timing: ASAP (Immediate prep) or scheduled time (+15m, +30m, +45m, +60m, or specific clock time).
- Record customer contact info, complete payment, and track the live countdown until pickup.
8 Bill Settlement, Gratuity & Split Tenders
When guests finish dining, click 【Settle】 on the table bill:
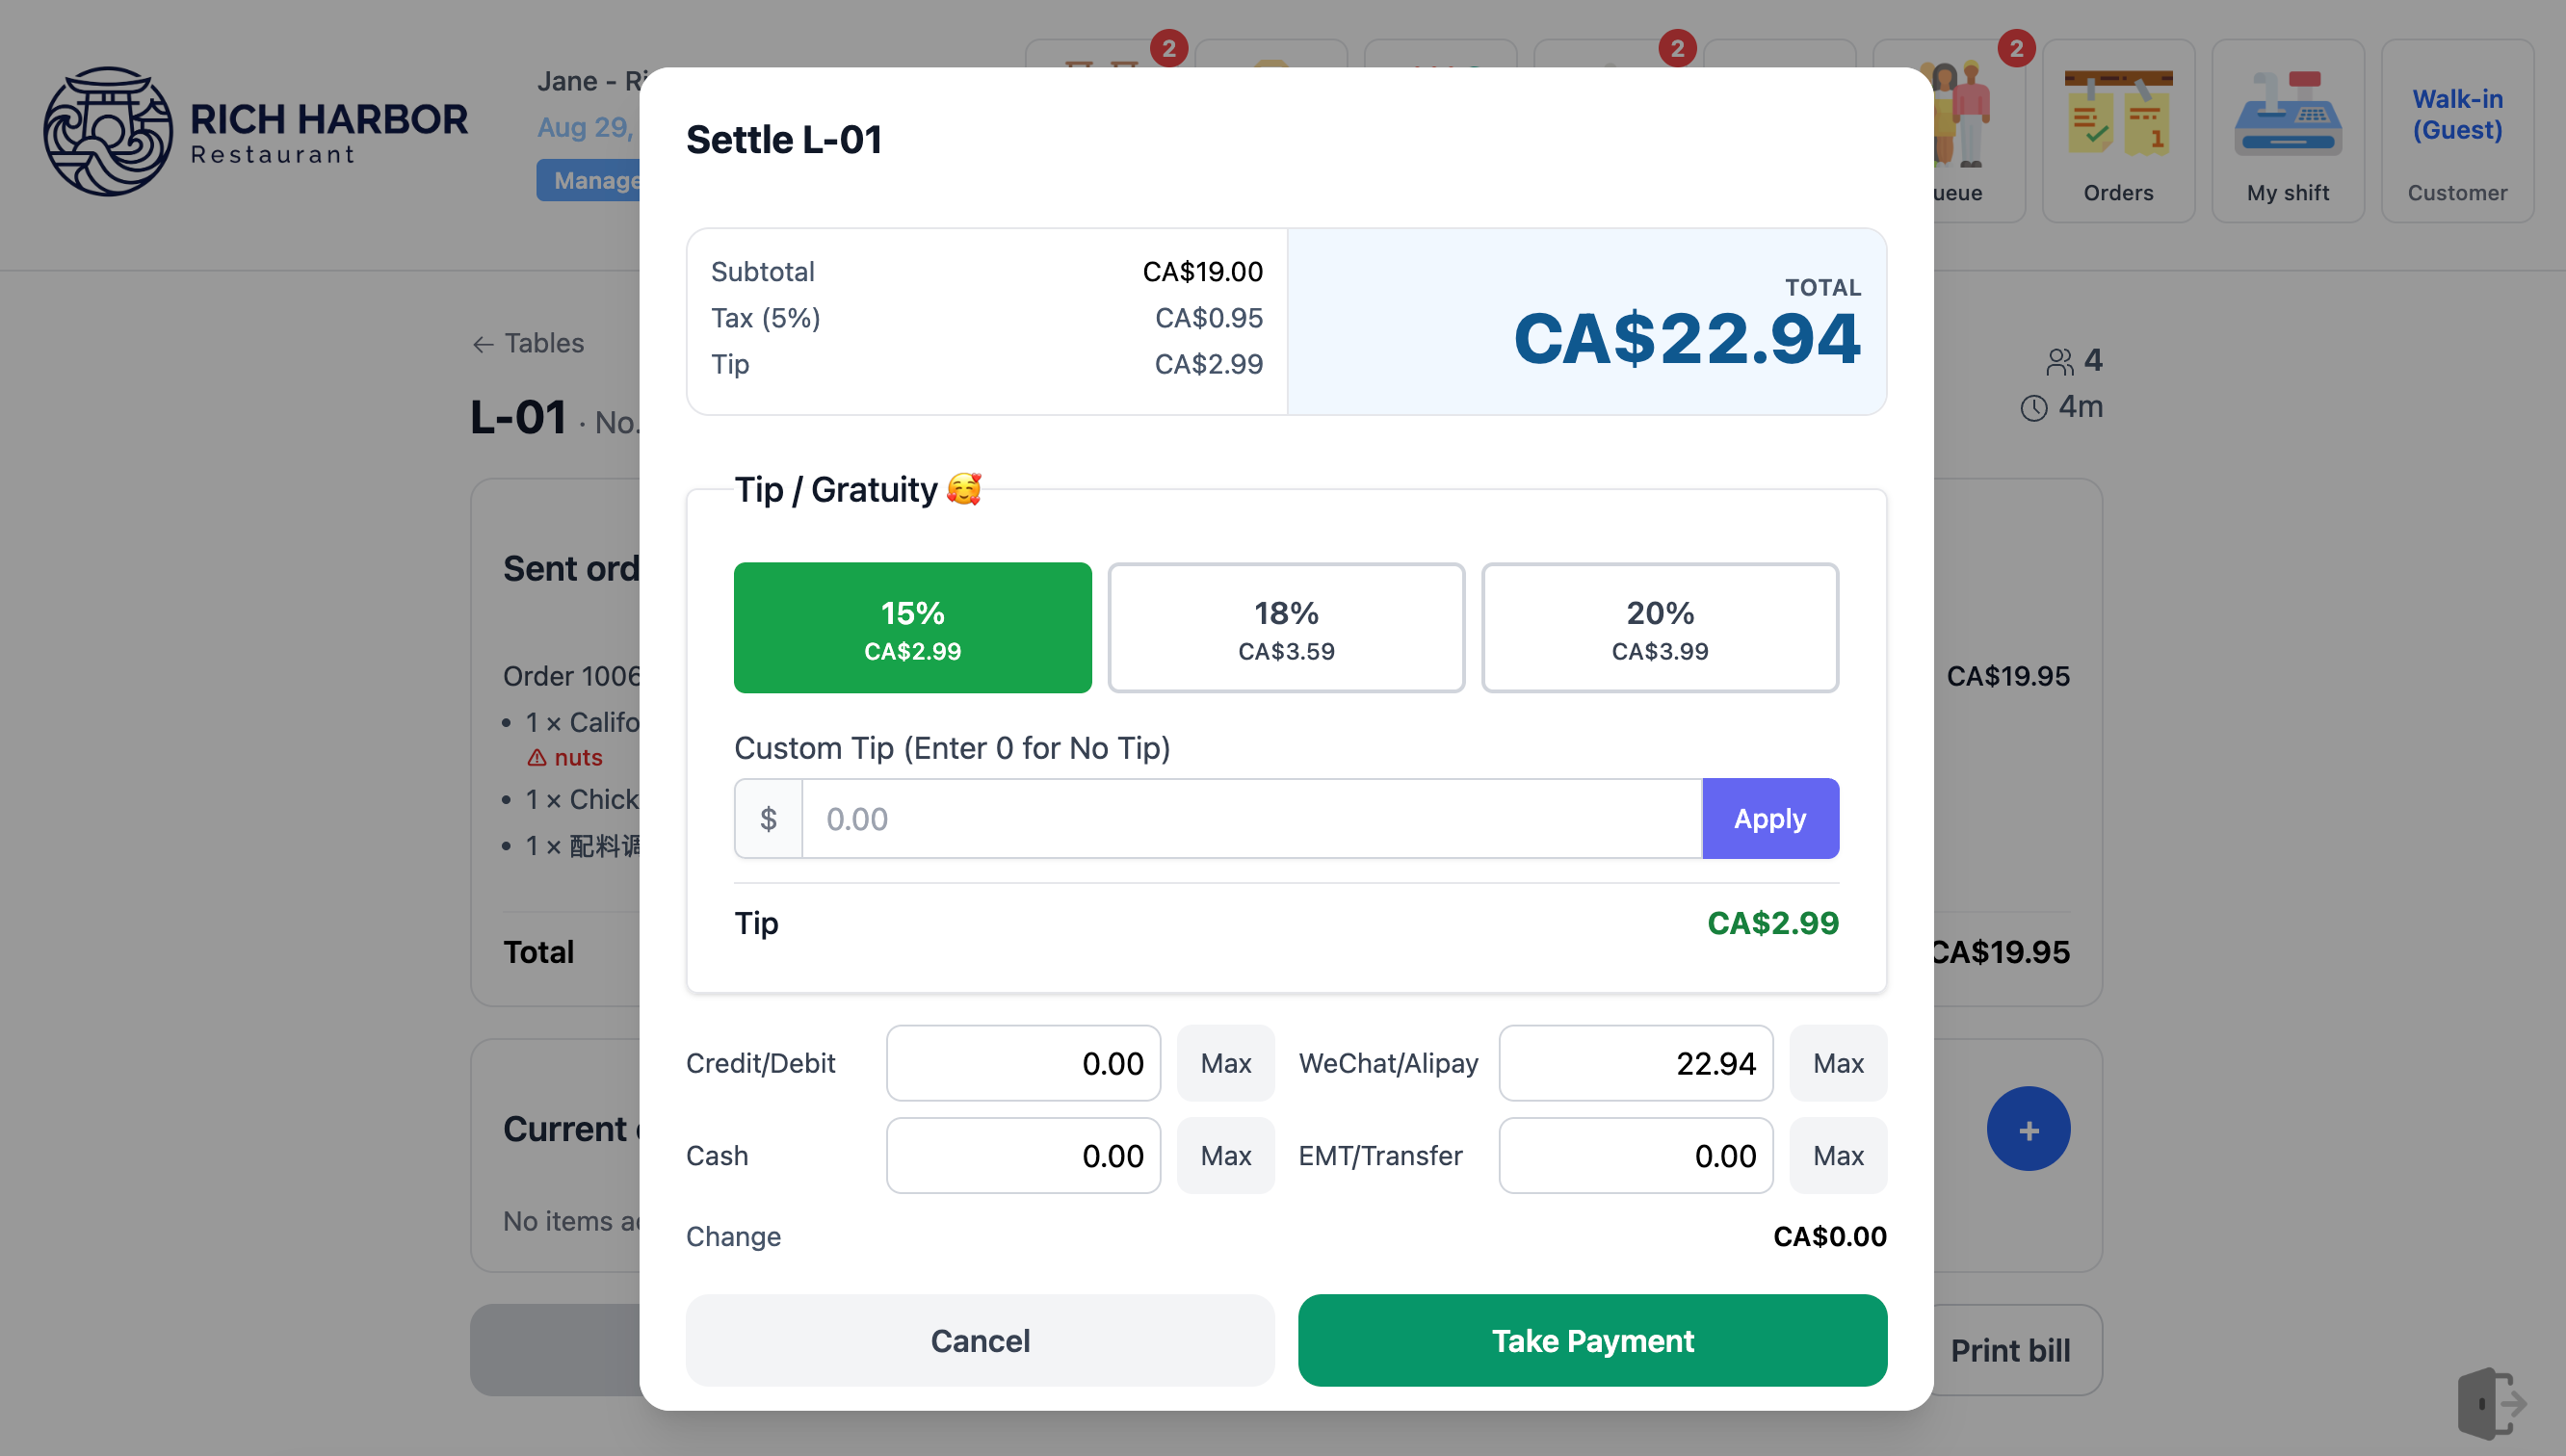
- Gratuity / Tip Selection: Select quick preset buttons (15%, 18%, 20%), enter custom amount, or choose "No Tip".
-
Multiple Payment Methods & Split Tenders:
- Card (Credit/Debit): Processed via Clover smart card terminal.
- Cash: Enter cash received; change due is highlighted in large digits, and drawer pops open.
- WeChat / Alipay: Quick QR code scanner payment.
- Loyalty Points & Store Credit: Redeem member wallet balance.
- Split Tender: Split a single bill across multiple payment methods (e.g., $60 Card + $40 Cash).
- Receipt automatically prints upon approval, and the table instantly returns to Green (Free) status.
9 Dish Returns & Multi-Tender Refunds
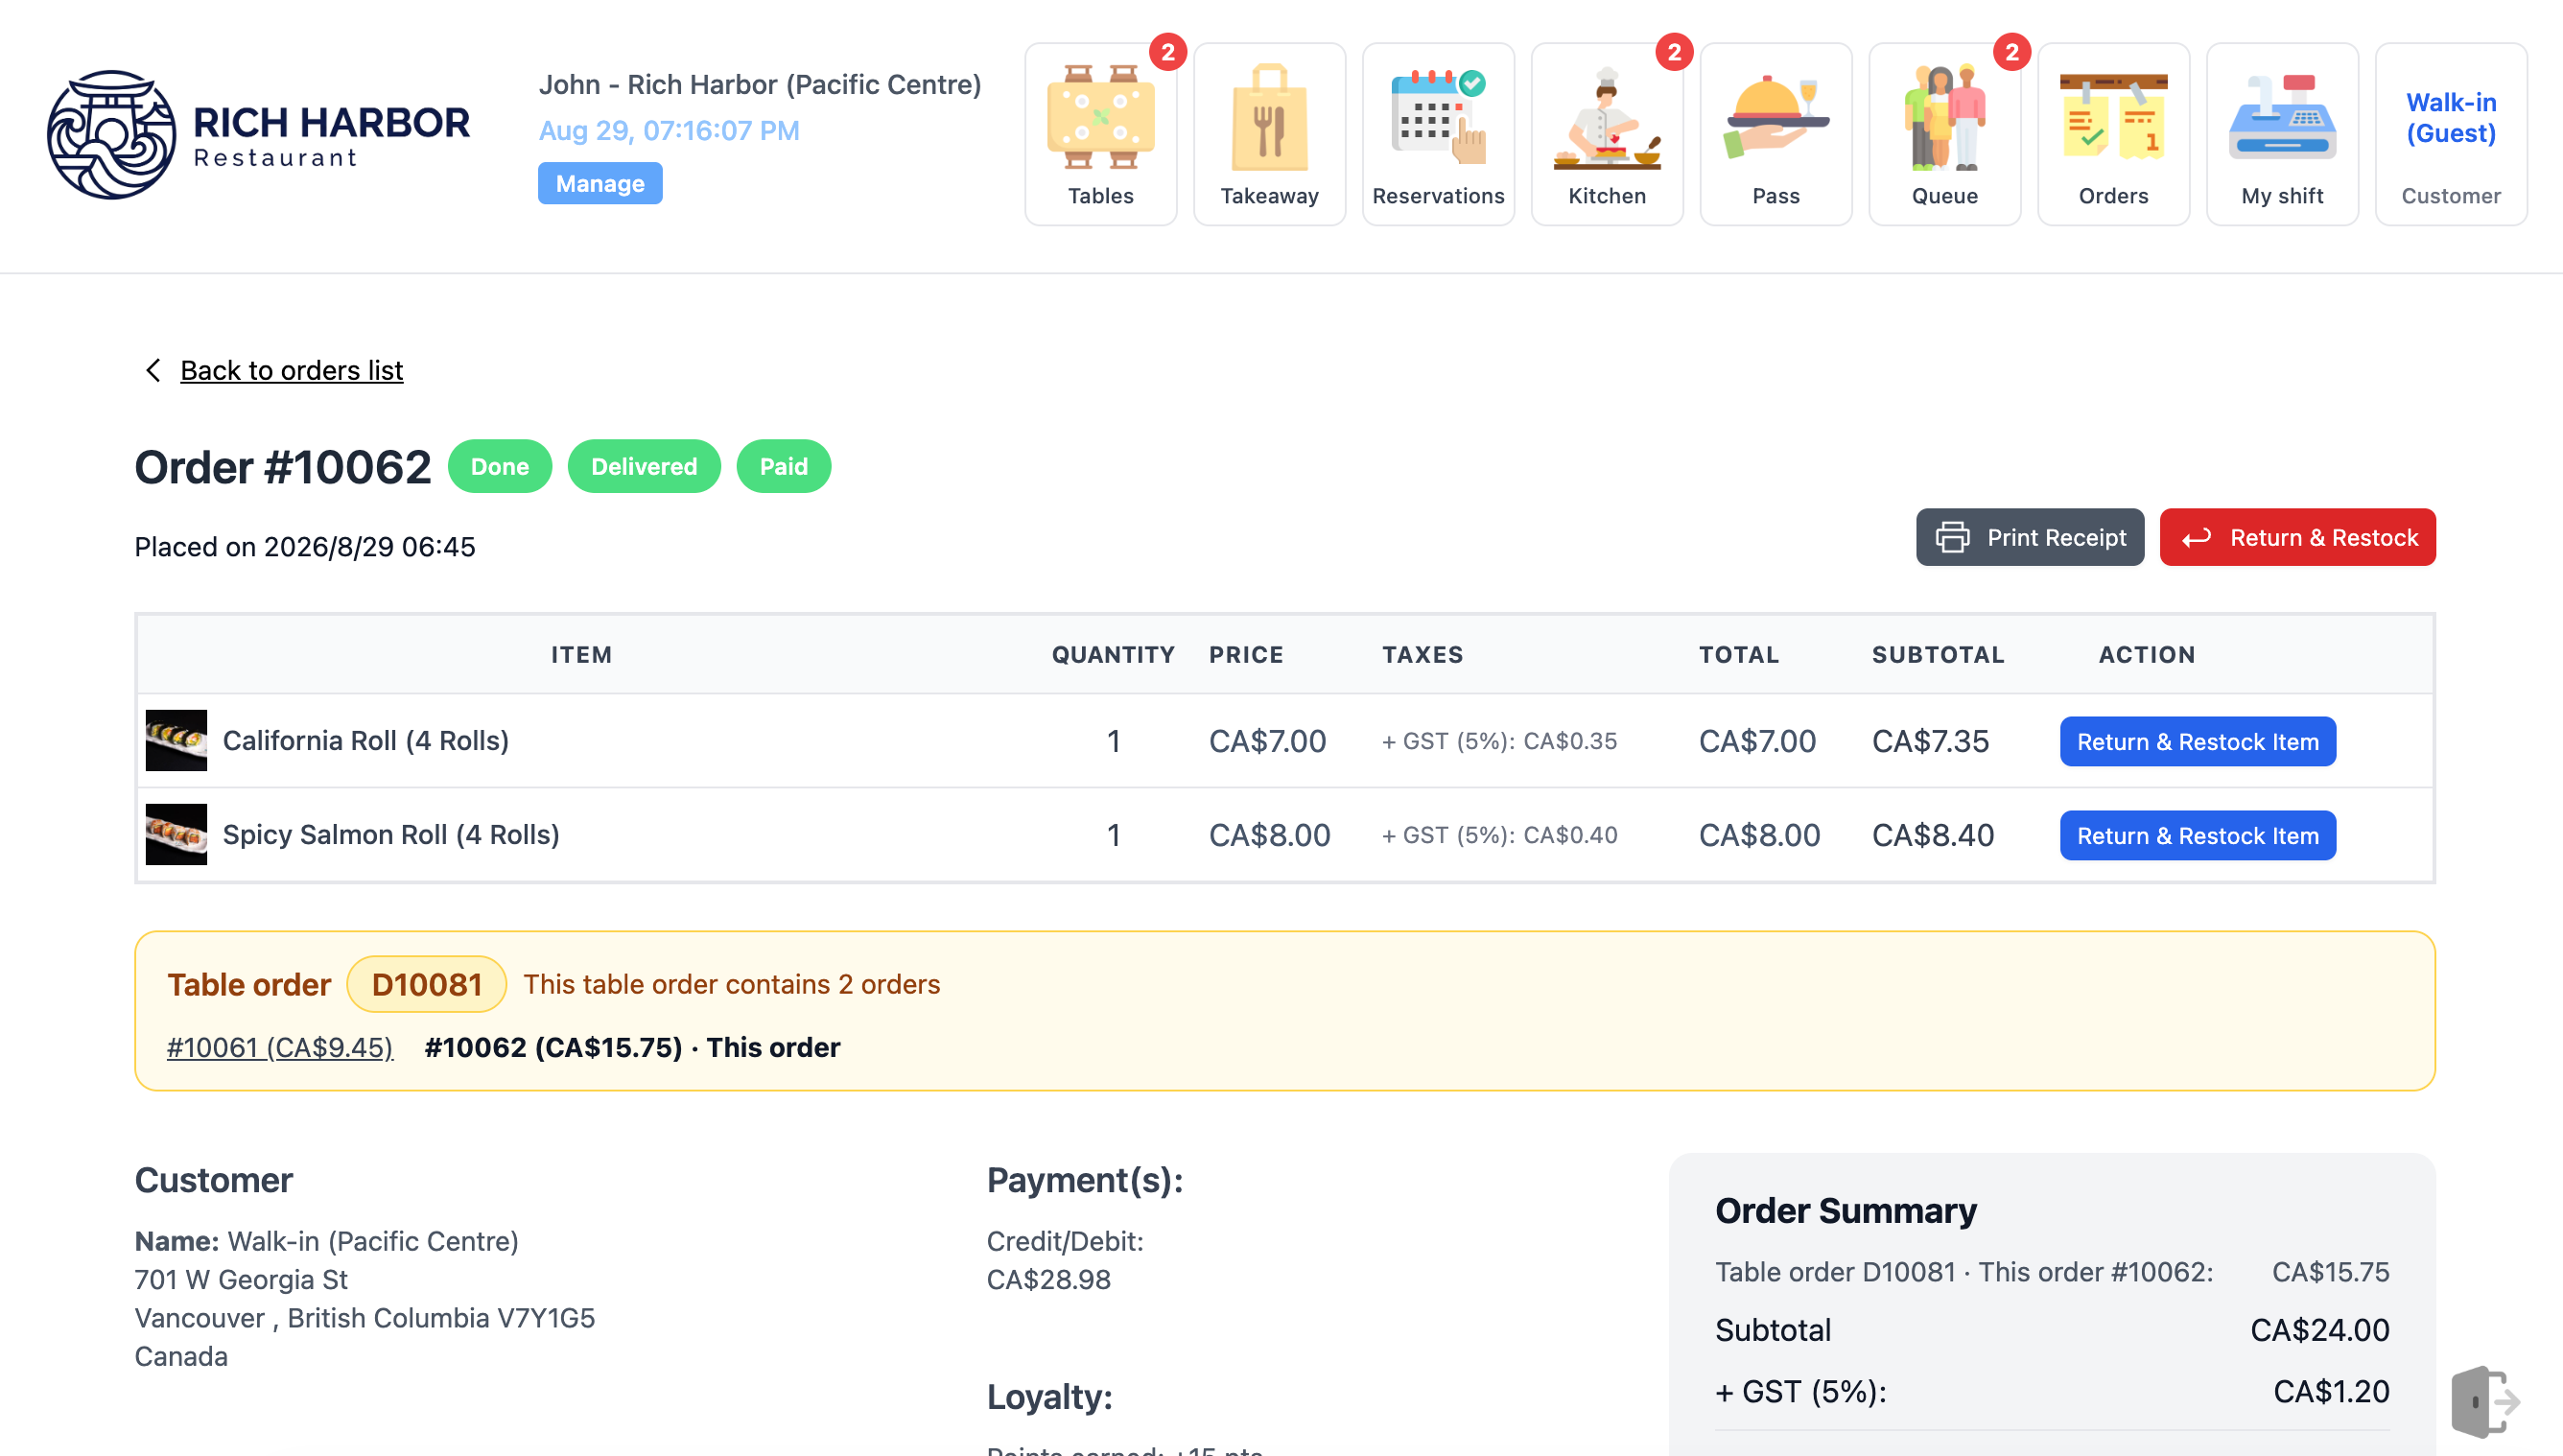
- Full Order Refund / Line-Item Return: Refund entire order (including tips) or return specific dish quantities.
- Original Tender Pro-Rata Rules: Refunds are automatically routed back to original payment methods proportionally.
- Recipe Raw Material Restocking: Returned items restock component inventory automatically (Applies to retail items; restaurant assemblies follow kitchen waste policy).
10 Blind Close Shift & Z-Report Printing
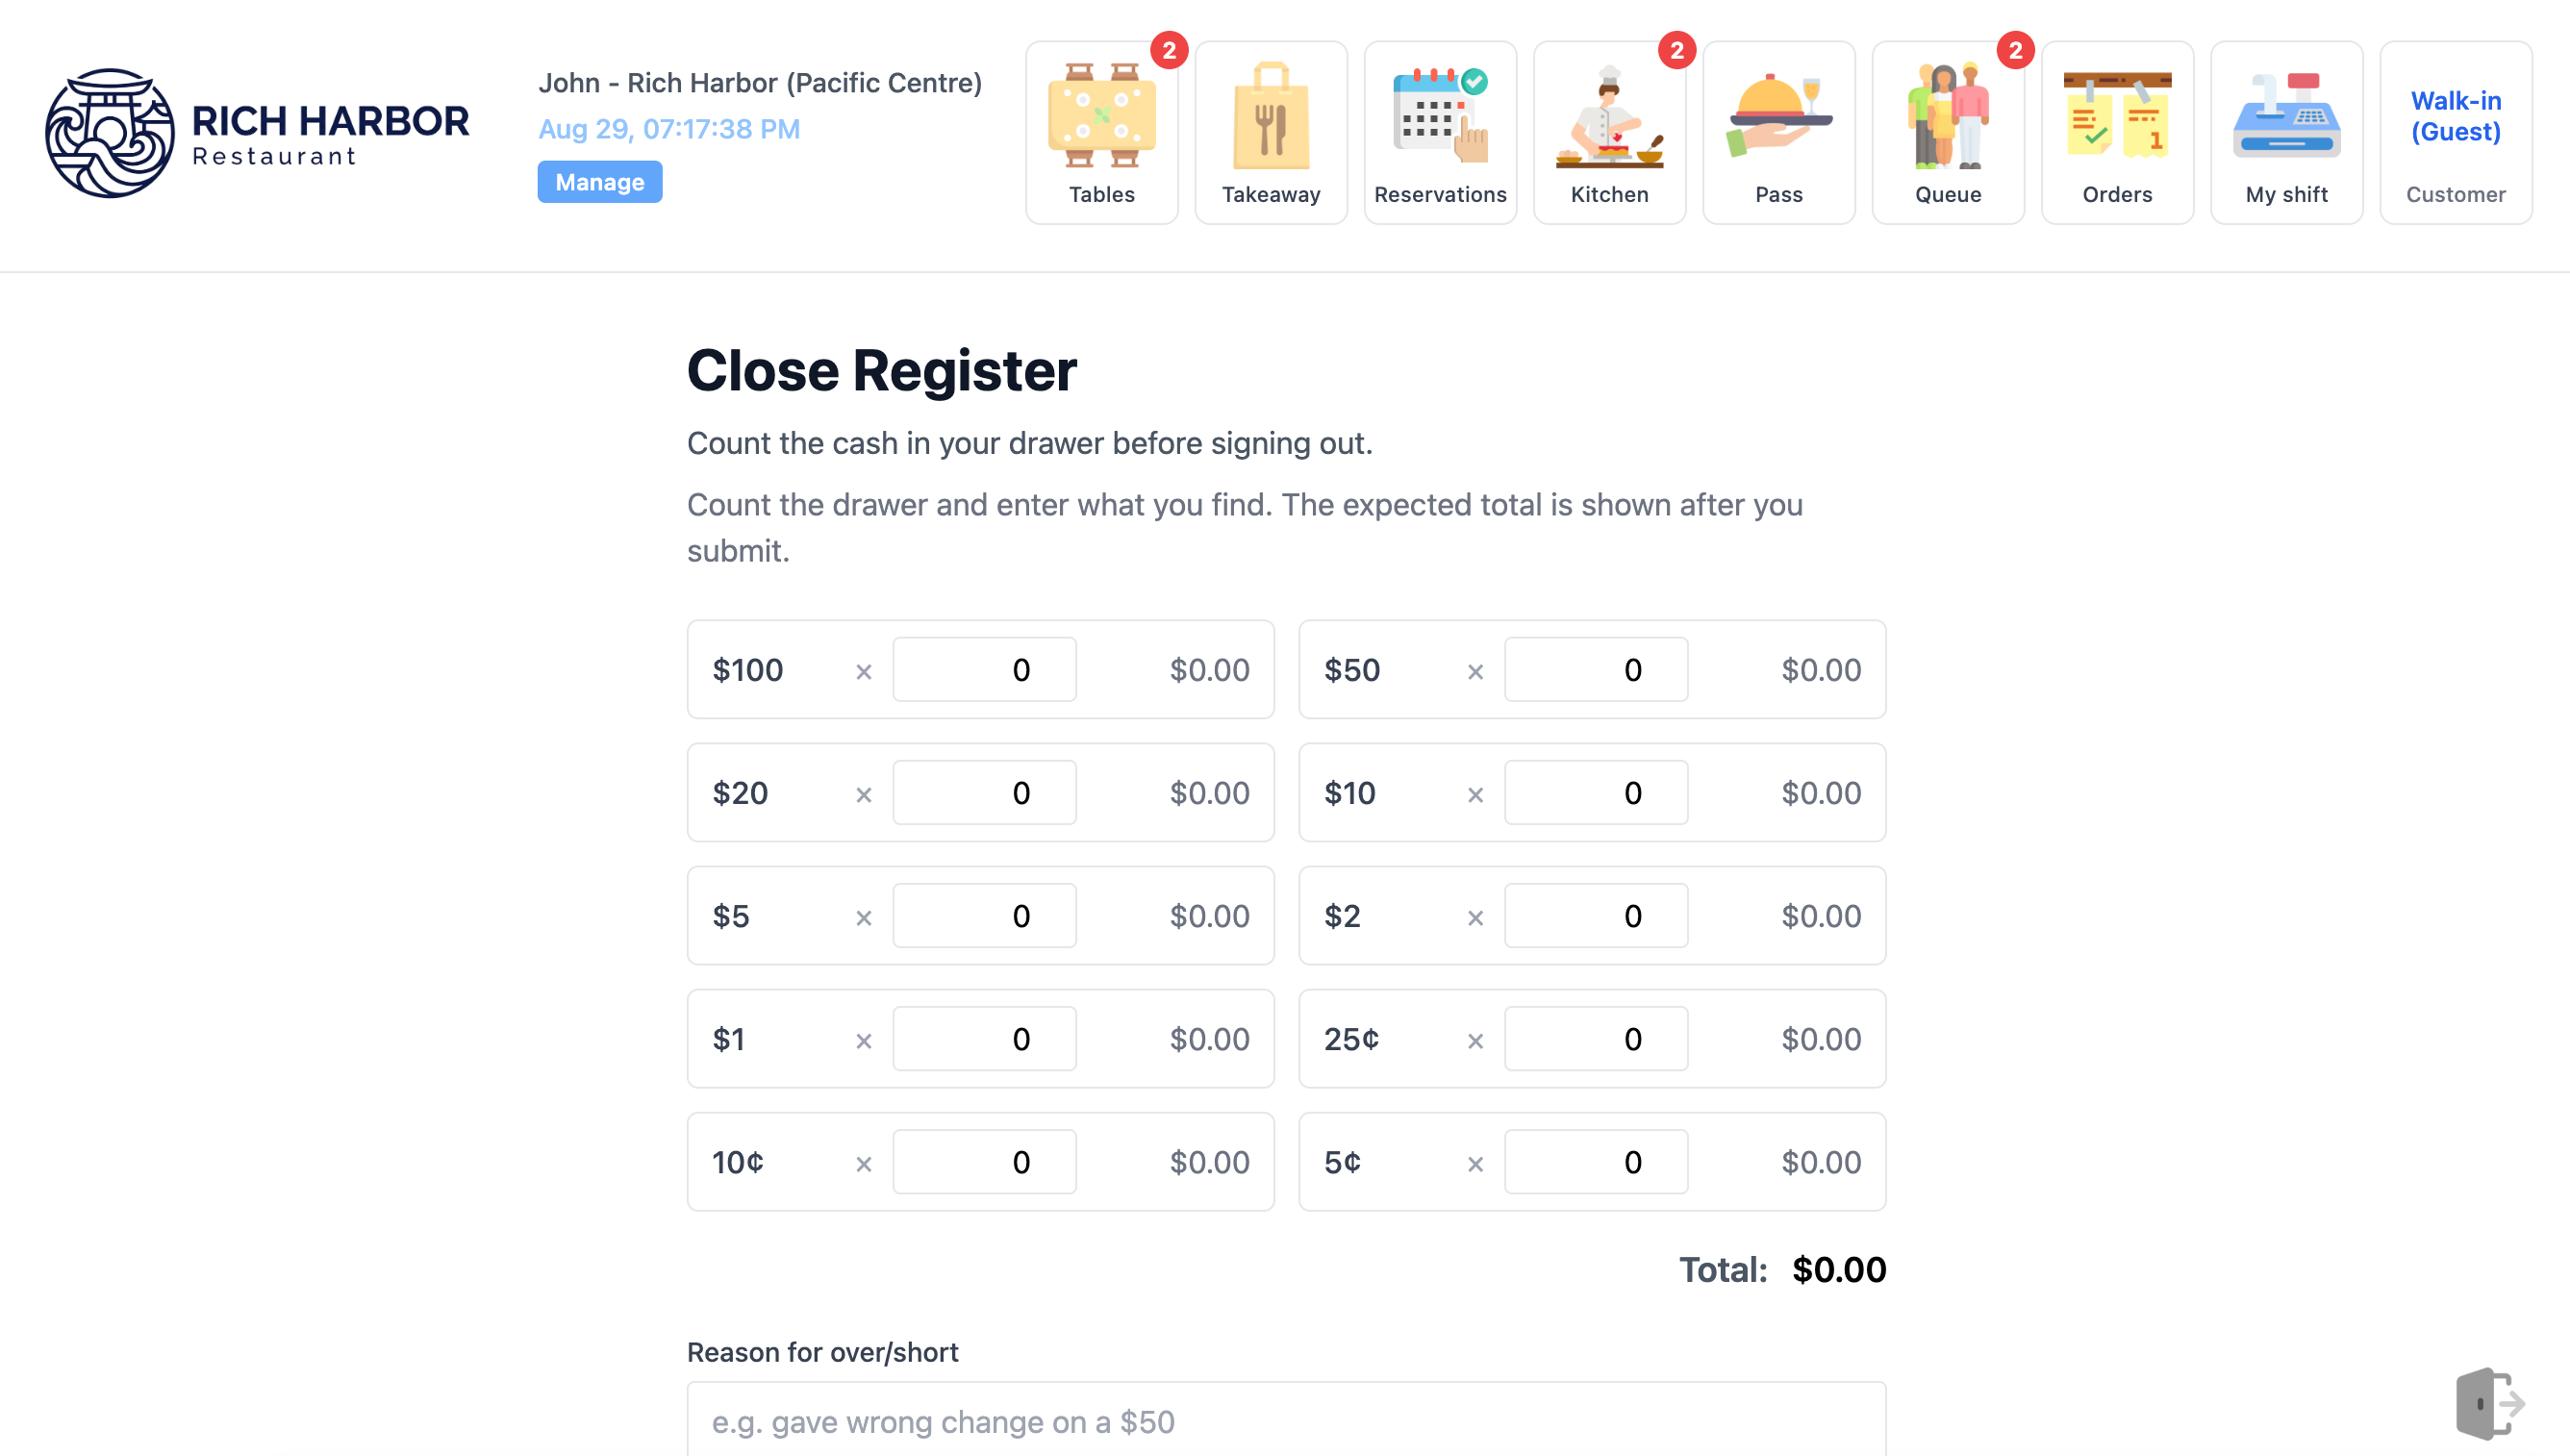
- At closing or shift handover, navigate to 【My shift】 -> click 【Sign out / Close shift】.
- Blind Count: System hides theoretical expected cash. Cashier physically counts and inputs drawer bills and coins.
- Variance Justification: If cash over/short exceeds threshold (e.g., $5.00), a mandatory explanation note must be submitted.
- Z-Report Printing: System prints the comprehensive end-of-day Z-Report with full financial totals for reconciliation.
11 In-Store Mobile Inventory & ERP
Access the 【Inventory】 menu from the management dashboard for tablet warehouse operations:
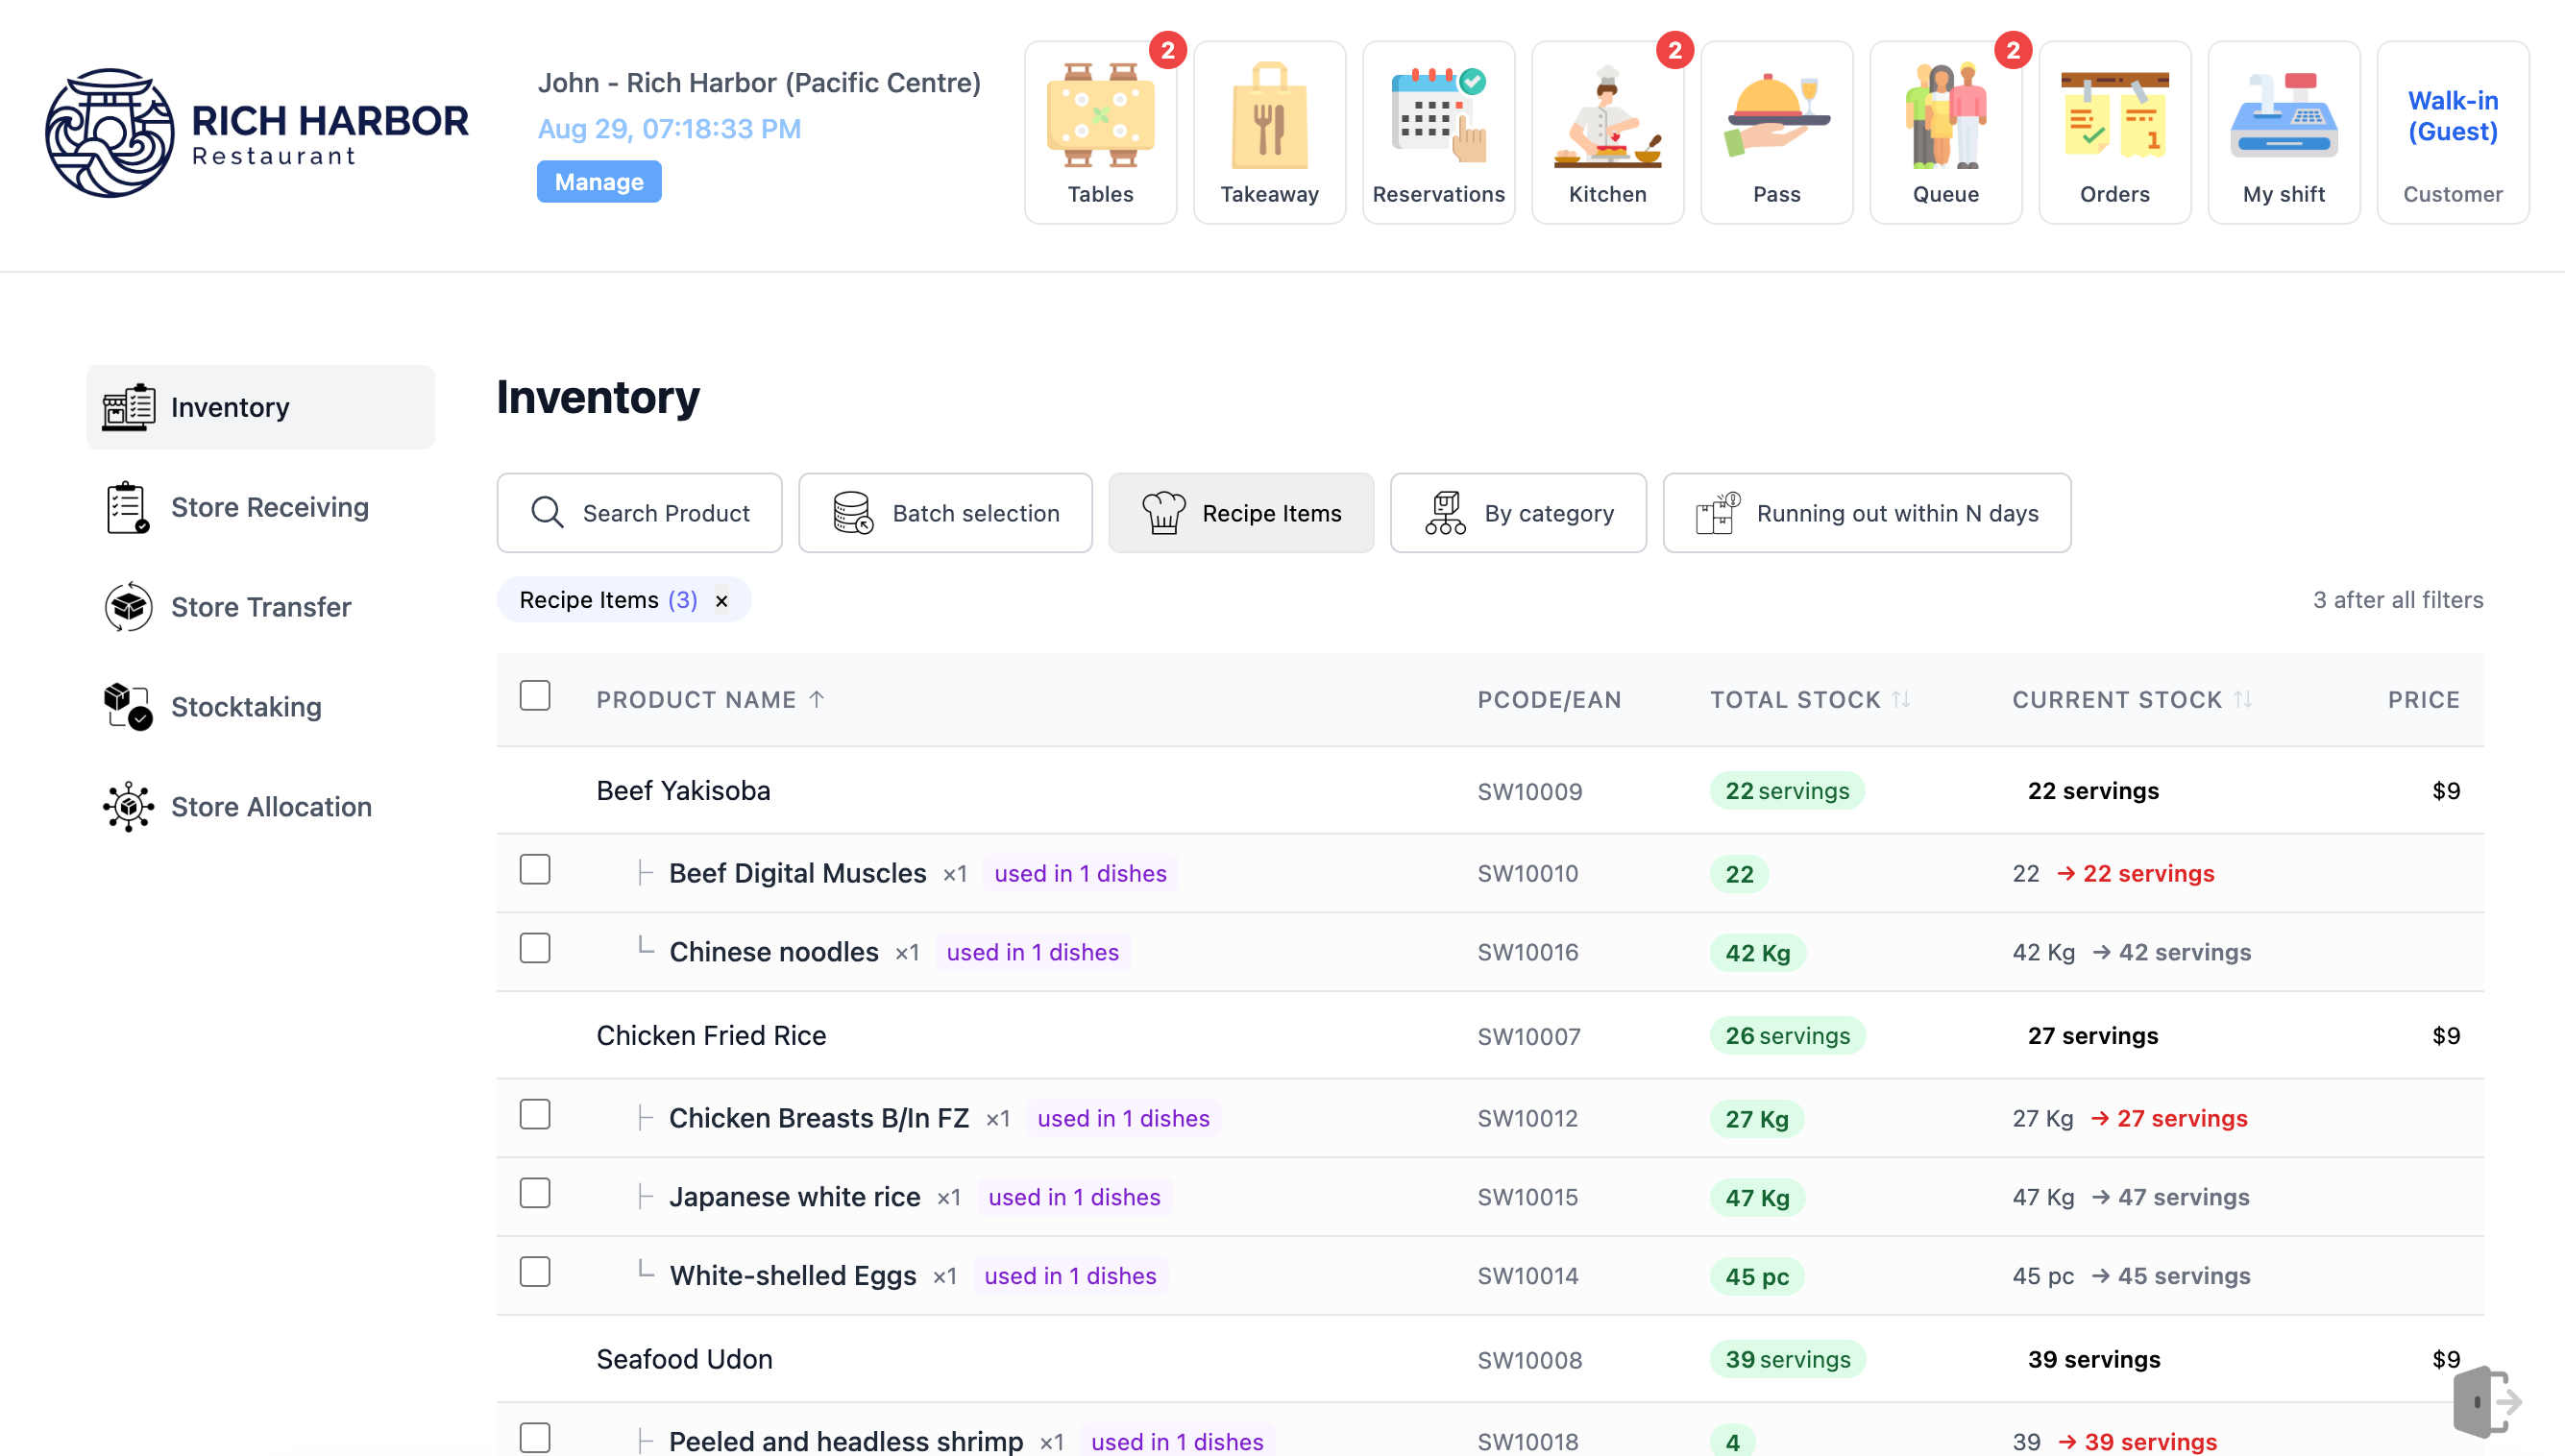
- Store Receiving: Scan and verify incoming supplier shipments against purchase orders.
- Store Transfer: Request or receive ingredient transfers from central commissary or sister stores.
- Stocktaking: Conduct periodic physical stock counts and record adjustments.
- Store Allocation: Track internal ingredient allocations to kitchen prep stations.
12 Sales, Tips & Product Analytics
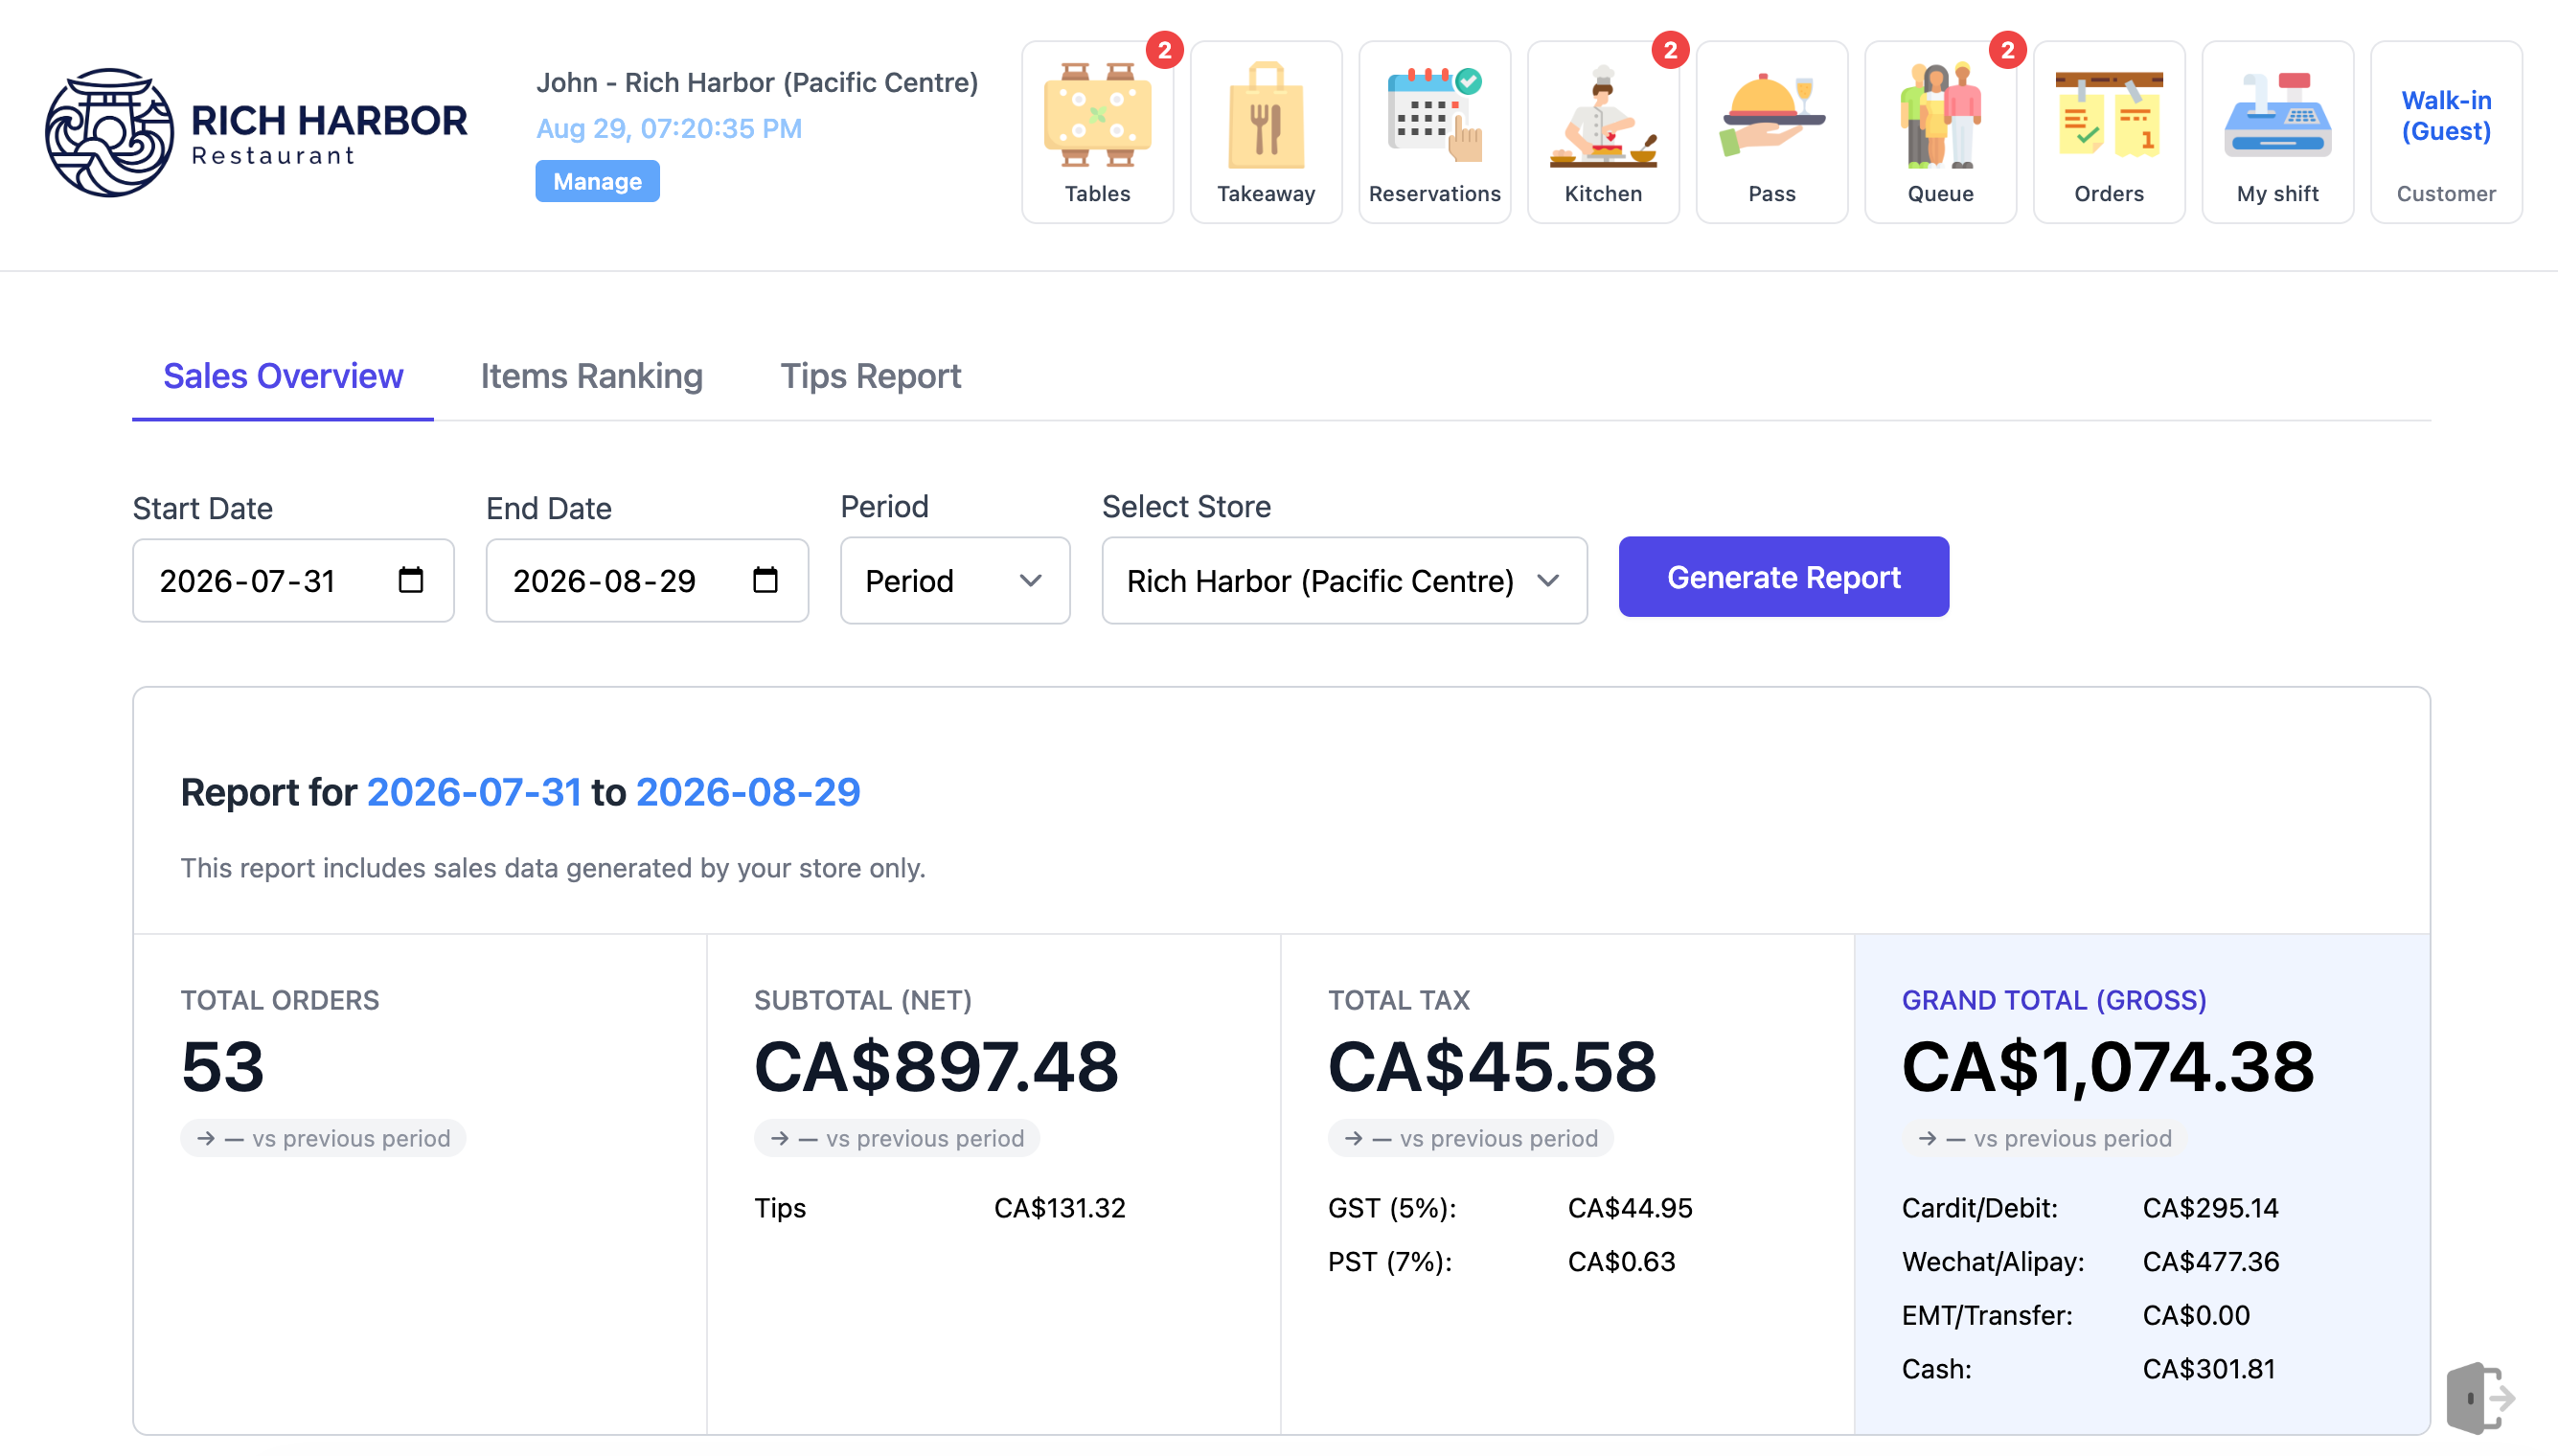
- Sales Report: View gross/net revenue, GST/PST tax subtotals, and tender breakdown by day, week, or month.
- Tips Report: Comprehensive server gratuity ledger for payroll distribution.
- Items Report: Best-selling dishes, category velocity, and low-movement menu items.